| Student Course Requests | |
| Last Updated: January 2026 | |
The Student Course Requests page (sometimes abbreviated as CRF) was created to help students quickly enter their course requests. It takes a list of courses a student is interested in and calls a validation routine to determine whether there are any roadblocks to the student registering for the selected courses. If a student’s course request issues can be resolved by obtaining the necessary overrides, the student may use this page to request them.
To use the Student Course Requests, go to myPurdue.purdue.edu and enter your career account name and password on the login screen and press the Login button.

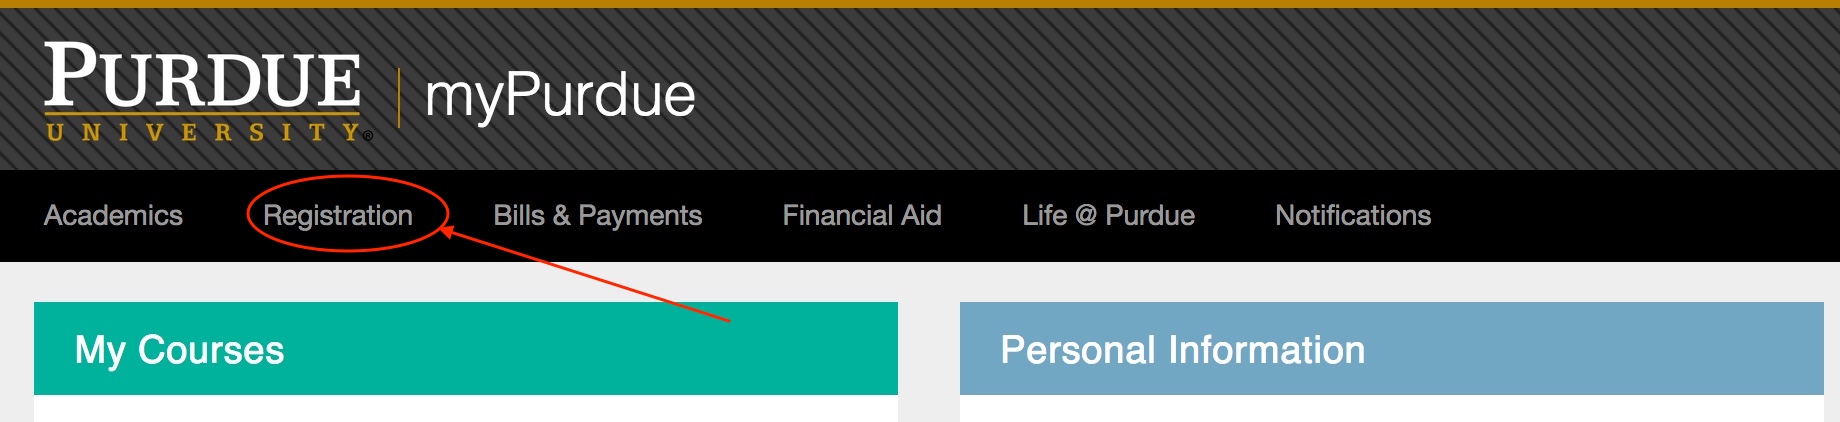
Find the Registration item along the top of the page and click on it.
Find the Register for Classes card and click the Course Request Form (CRF) link.
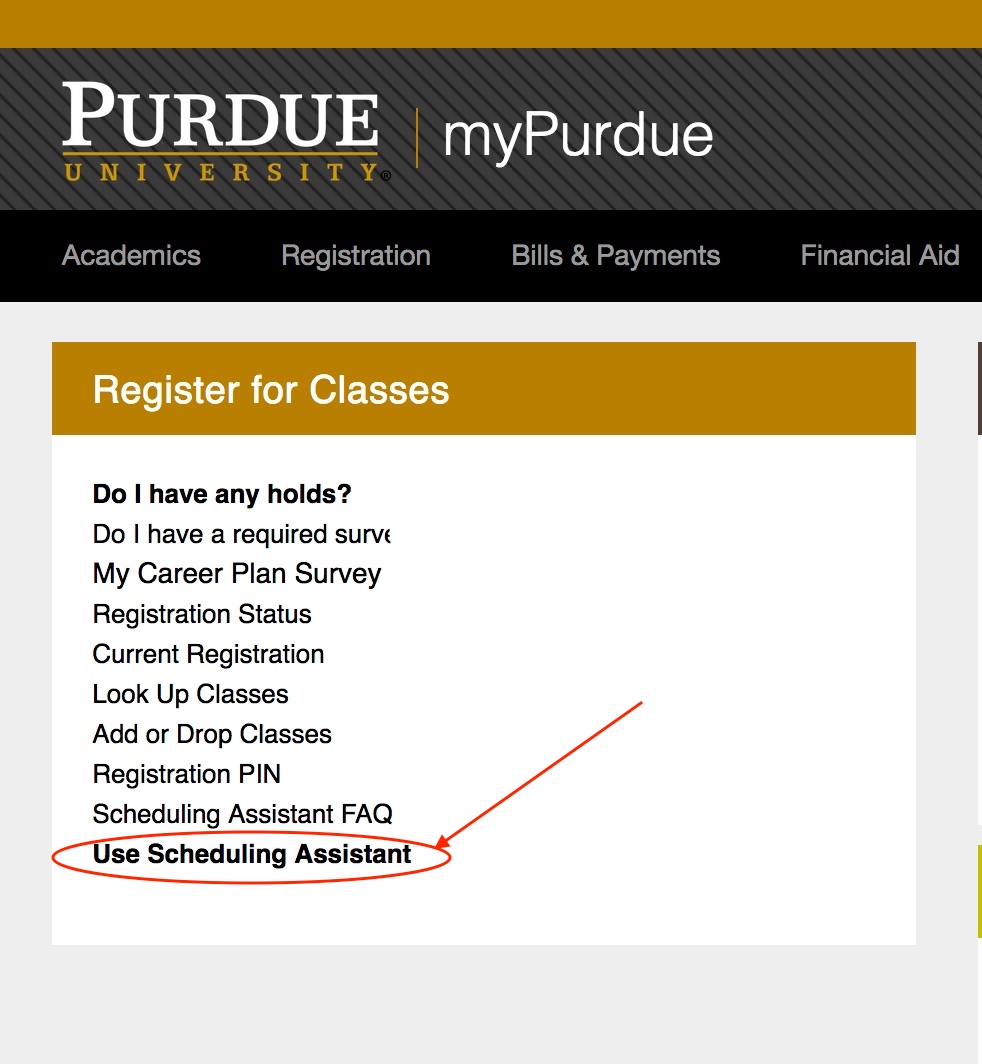
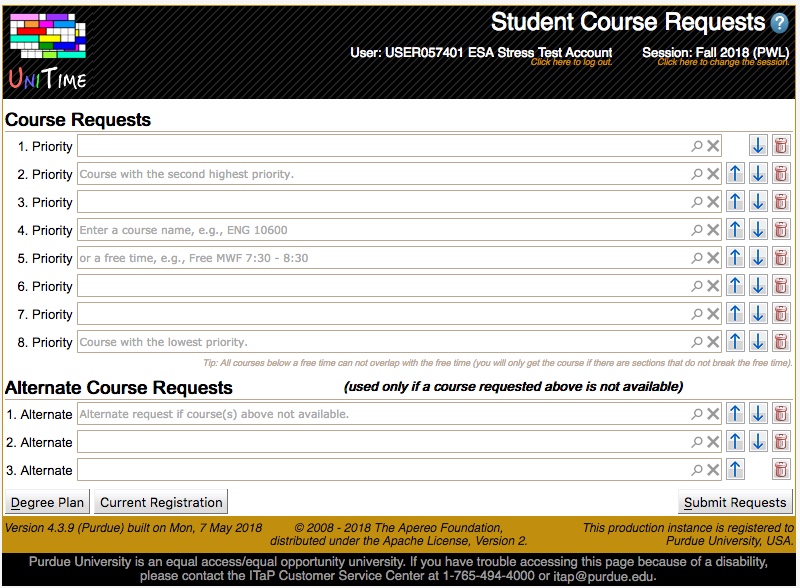
This brings up the Student Course Requests page.

If there are multiple terms available for pre-registration, a dialog with term choices will appear. Select the term in which you want to fill in the course requests.
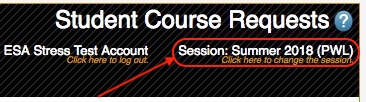
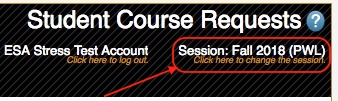
You can always review the Session in the upper-right corner to ensure the correct term is used for registration.

If the term listed is incorrect, click on the term that is listed.
If a student has been advised using the Advisor Course Recommendations page first, the page will get pre-populated with the advisor recommendations. You still need to review the list and click the Submit Requests button to confirm your pre-registration!
Note: The recommendations can also be accessed at any time by clicking the Advisor Recommendations button.
Click Apply to fill your Course Requests with the advisor recommendations, or Close to close the dialog.
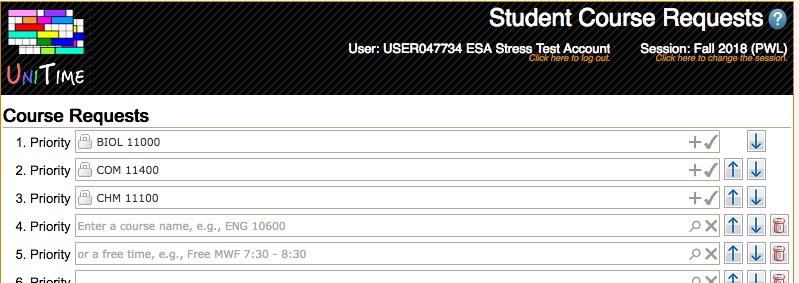
Depending on the status of your course registration, when you enter the Student Course Requests page, you may either see the page with no courses listed or with a set of courses listed and icons next to them indicating the status of each course requested.
If you have not previously registered for any courses, the Student Course Requests page will display the Course Requests tables for entering your course requests with either no courses listed or with courses pre-populated from the advisor course recommendations.
If you are currently enrolled in courses, such as those from a Learning Community, they will be listed on the course request form with a grey lock.lock icon before them and a grey check mark ![]() to the right side of their text box. These courses cannot be removed from your course requests.
to the right side of their text box. These courses cannot be removed from your course requests.

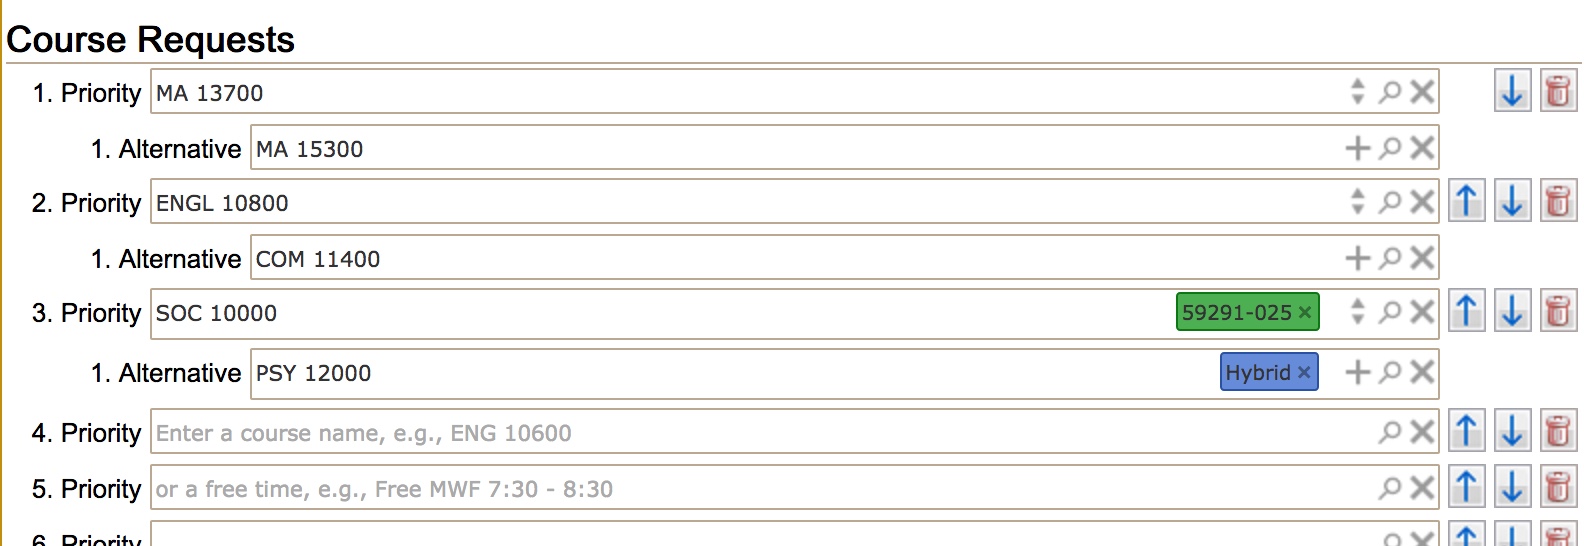
Enter all courses you wish to take in the Course Requests grid. You should enter the courses in descending order from your highest priority to your lowest priority. If there is an alternative to any specific course you want to take, you can enter that information by entering the alternative course into the 1. Alternative indented line that appears underneath the primary course request once you select the course. It is possible to enter more than one alternative for a primary course request by clicking the plus ![]() icon at the right hand side of the 1. Alternative text box. This will bring up an additional Alternative text box. This can be repeated as many times as needed.
icon at the right hand side of the 1. Alternative text box. This will bring up an additional Alternative text box. This can be repeated as many times as needed.

Also, if you want to take a specific number of courses to make progress toward a degree, you may use the Substitute Course Requests section of the page to request a set of substitute courses that are acceptable if any course in the prioritized list is not available.
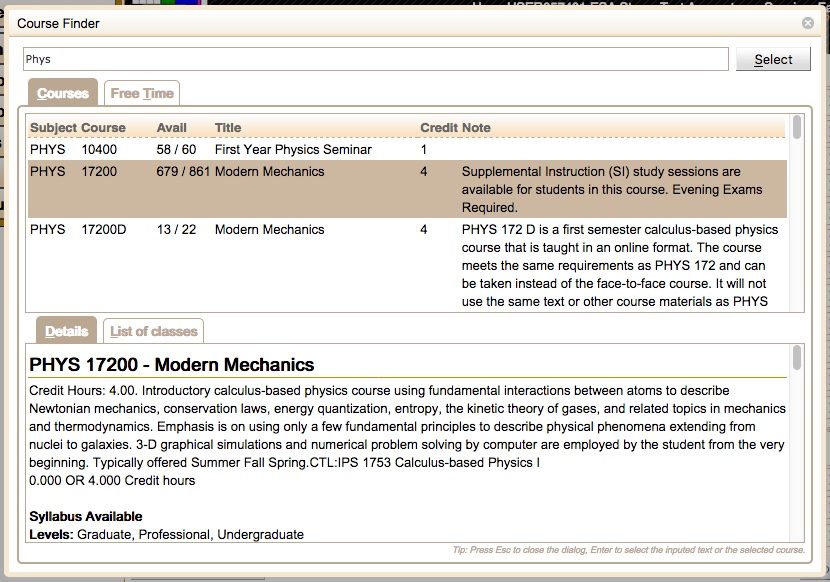
From the Course Requests grid, you can add courses to your list by clicking the magnifying glass icon ![]() . This opens a dialog that lets you search for courses. You can enter a course number or a set of words that may be found in the title of the course. The Course Finder dialog will display a set of courses that match your search criteria. You can click each course listed to see more details in the course catalog.
. This opens a dialog that lets you search for courses. You can enter a course number or a set of words that may be found in the title of the course. The Course Finder dialog will display a set of courses that match your search criteria. You can click each course listed to see more details in the course catalog.
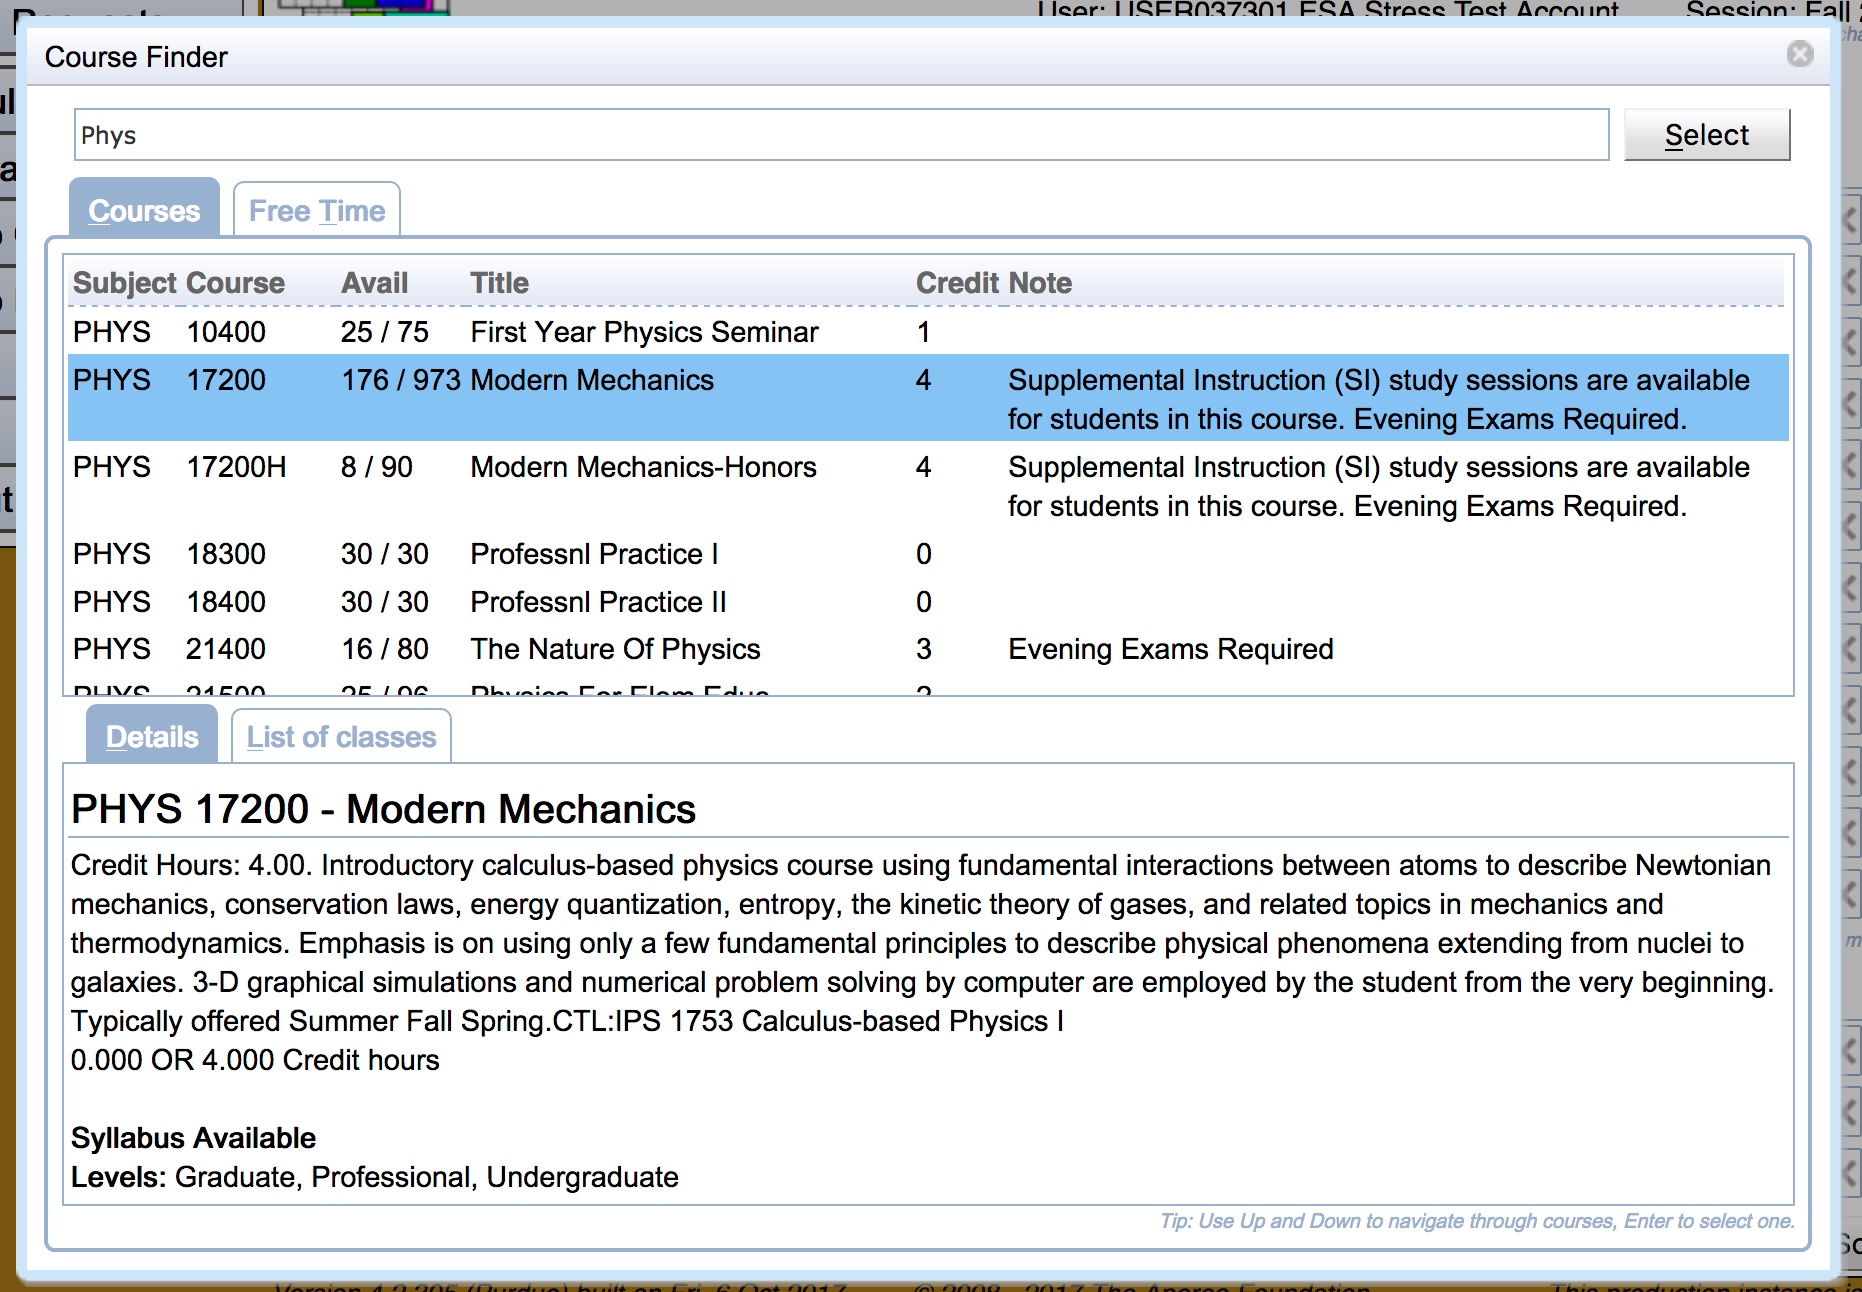
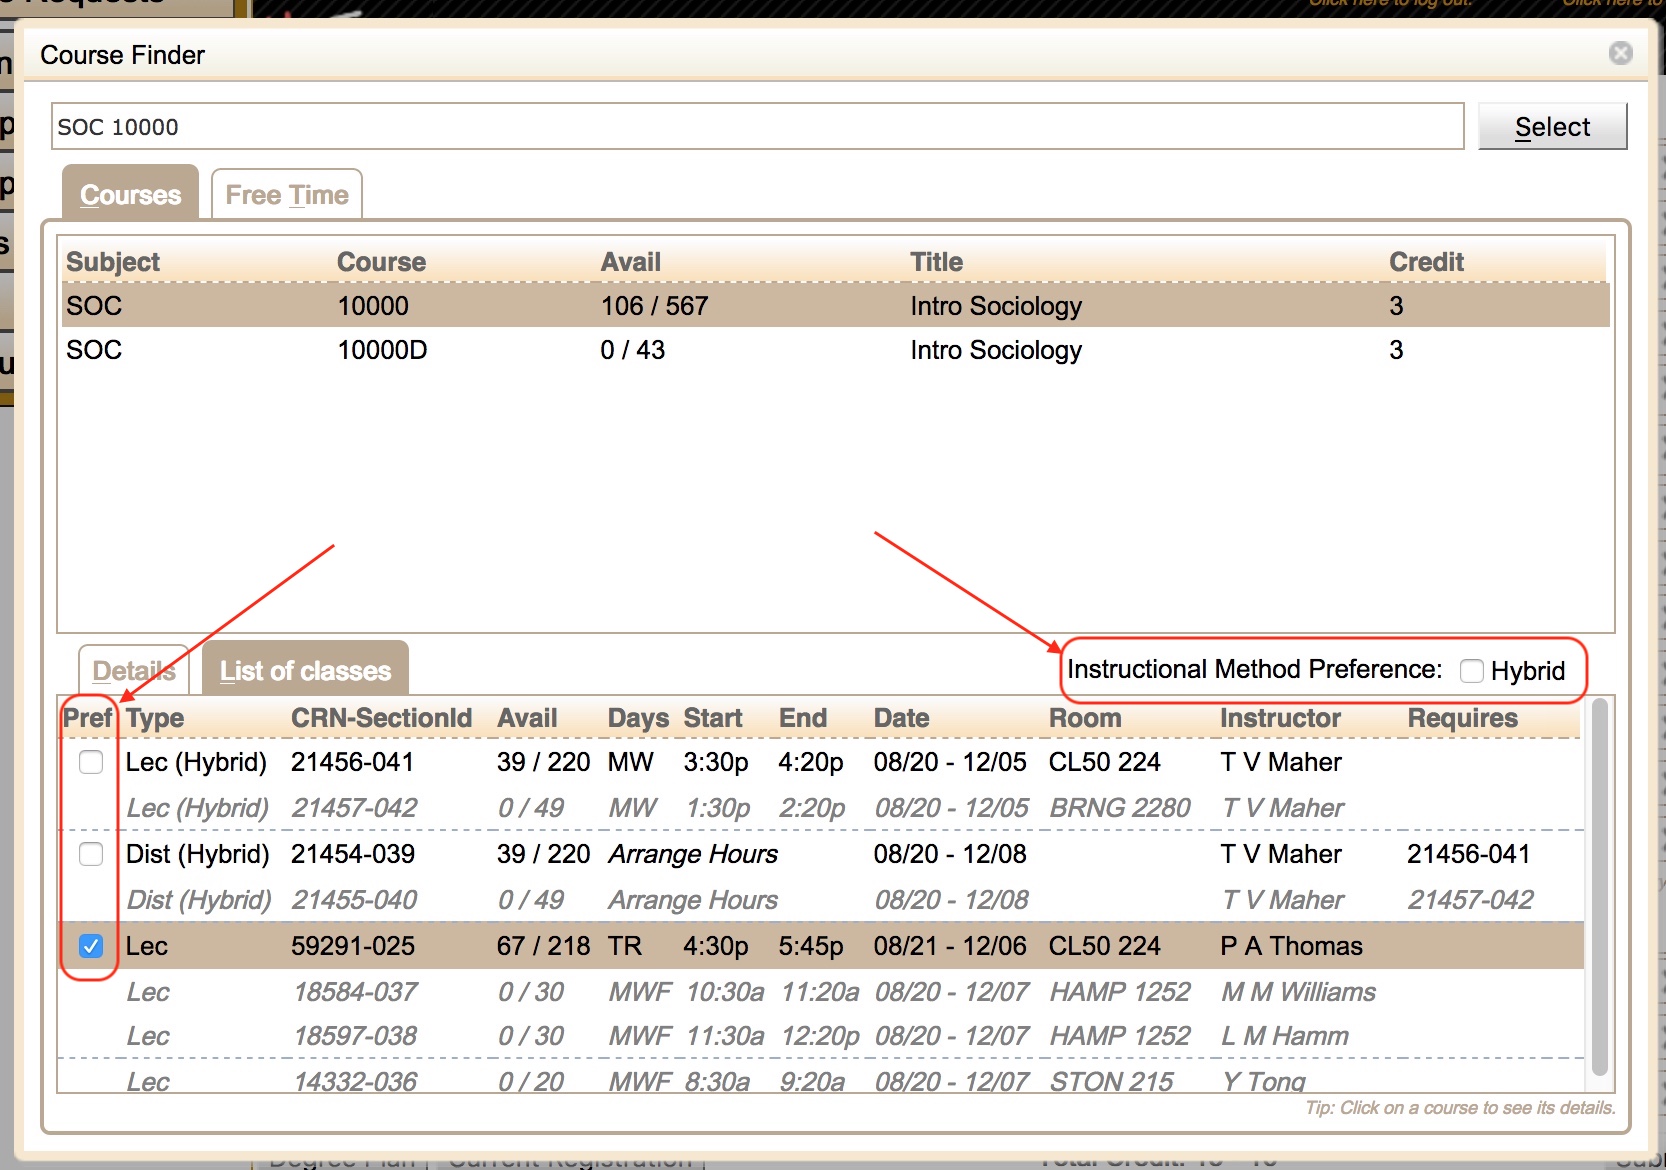
Note 1: Multiple courses can be selected using the checkboxes next to each course in order to provide alternatives. The courses will be listed in the order they have been toggled.

Note 2: The checkboxes next to the instructional methods or individual sections can be used to provide preferences.
Once you have found the course you are looking for, double-click the course to select it, or hit the Select button. This closes the window and populates the appropriate field in the Course Requests grid.
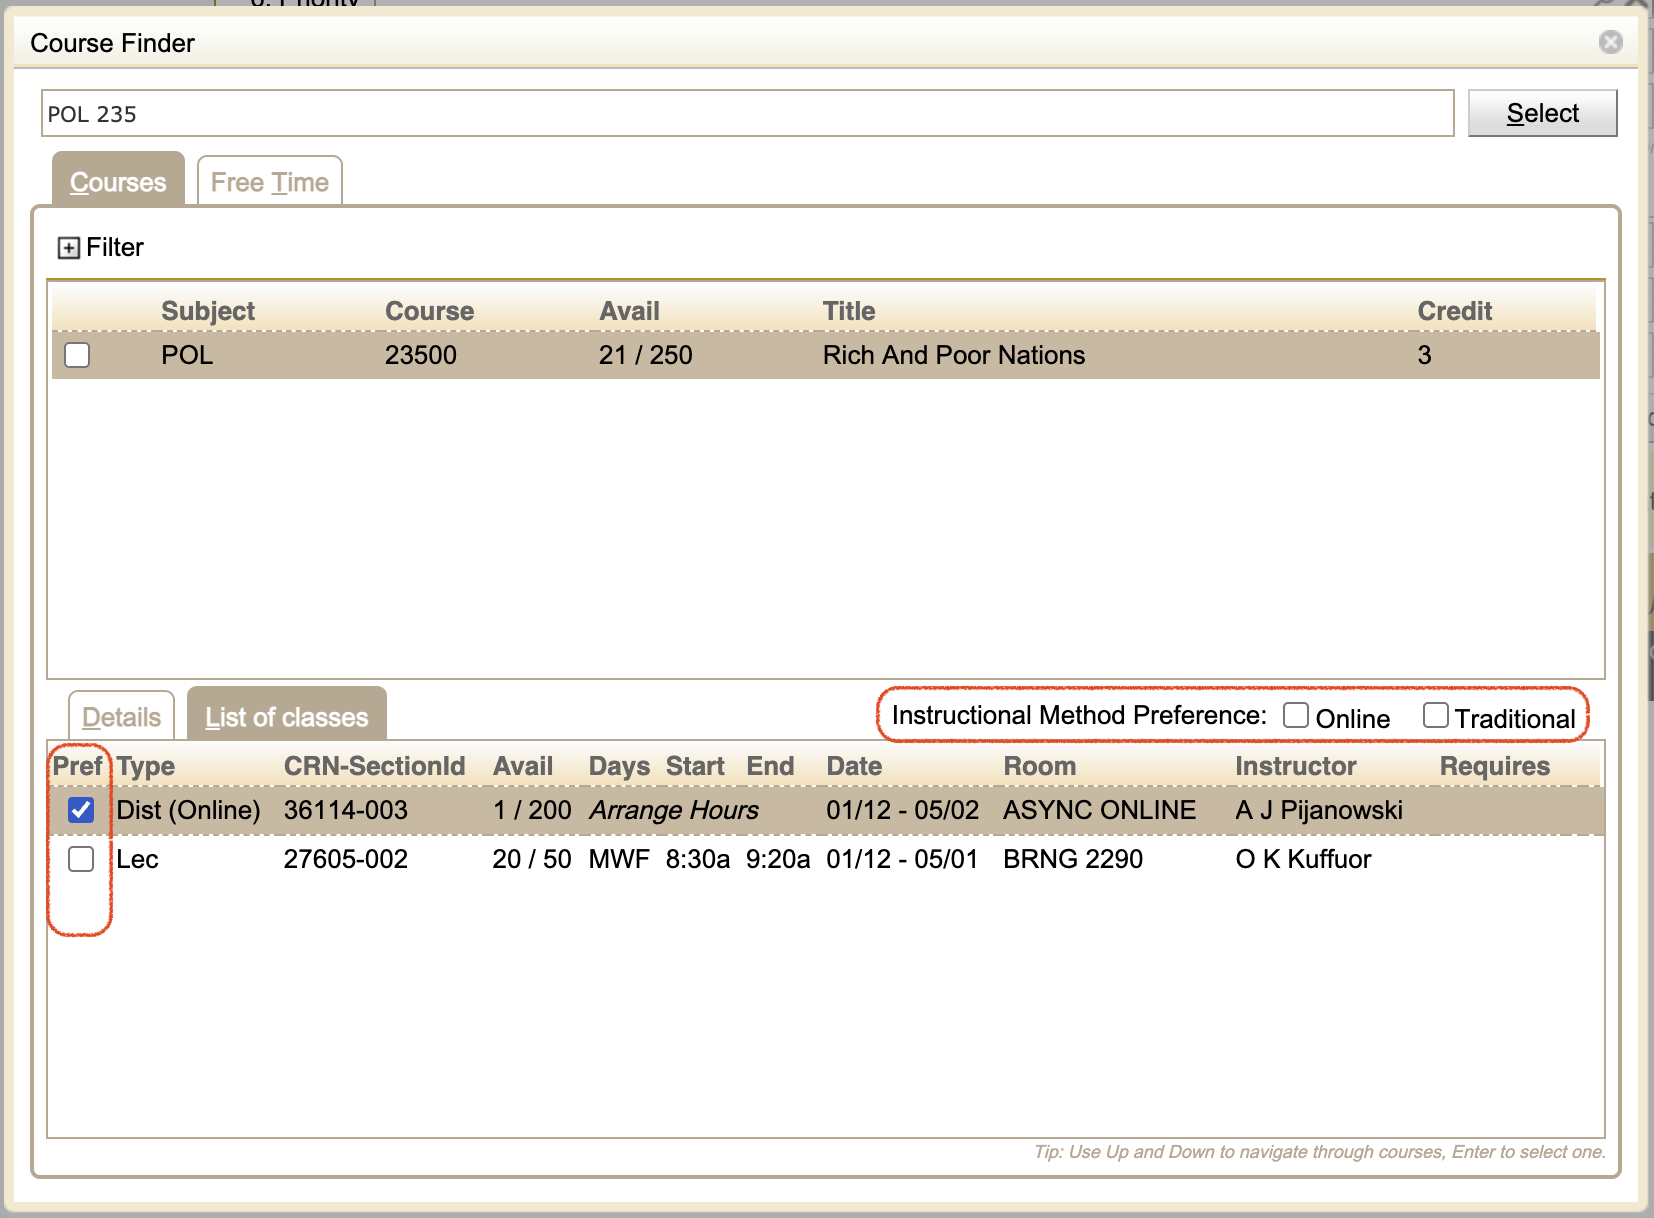
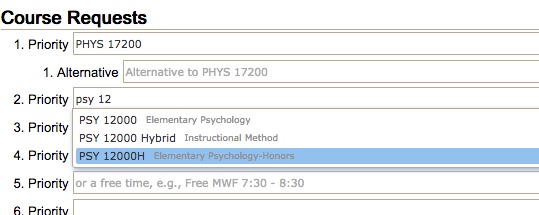
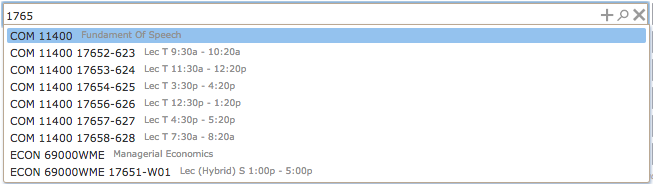
In addition to using the magnifying glass icon ![]() to bring up the Course Finder dialog. You can type your search directly into the input box, and it will show a drop-down list of courses that match your search criteria. You can then select a course from the drop-down.
to bring up the Course Finder dialog. You can type your search directly into the input box, and it will show a drop-down list of courses that match your search criteria. You can then select a course from the drop-down.
Note: The Student Course Requests page may suggest multiple suffixed course offerings for a course number. These are different variations of the same course. These suffixes will not be shown in myPurdue. Pay attention to the suffix to ensure you select the correct version for your needs. For example, if you want to take an honors version of a course, you would pick the one with an H suffix and the word “- Honors” in the title.
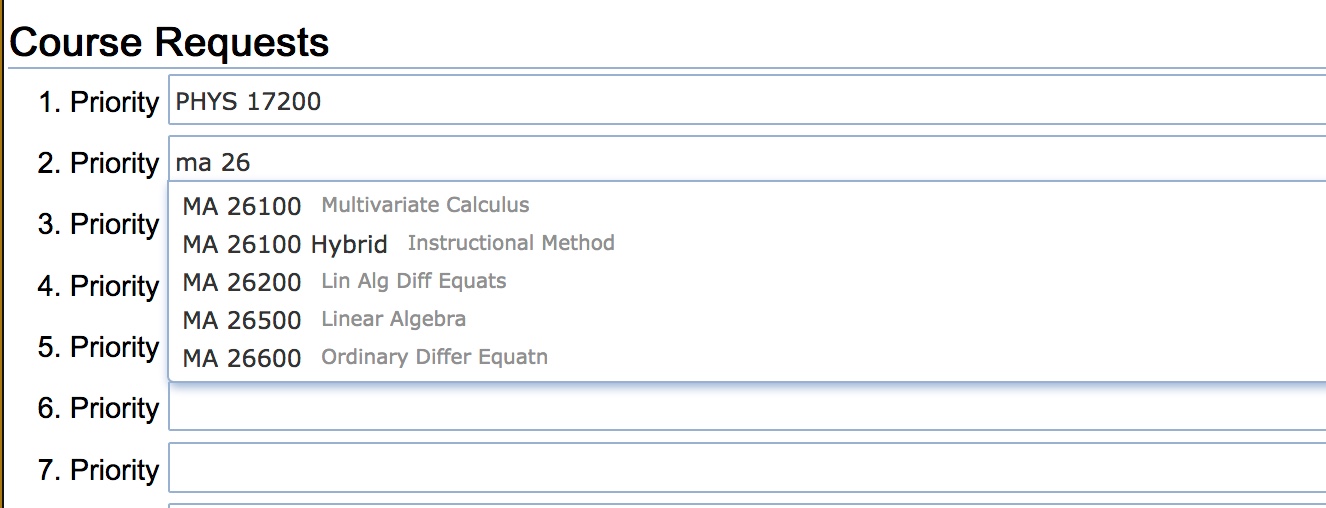
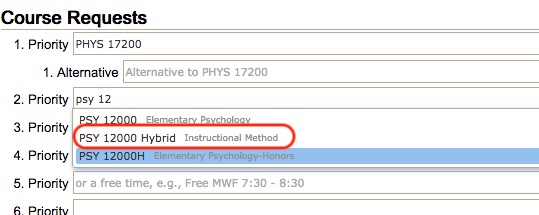
It is possible to add instructional method and course section preferences by typing into the input box.
As you type a course number, if UniTime detects that a hybrid or online instructional method is available, it will list the method as an option to select.

In addition, once you have selected a course number, if you press the spacebar, it will list the sections available for preferences.
This process can be repeated multiple times to add preferences for multiple sections.

It is also possible to look up a course by its CRN. To do so, just start typing in the CRN.

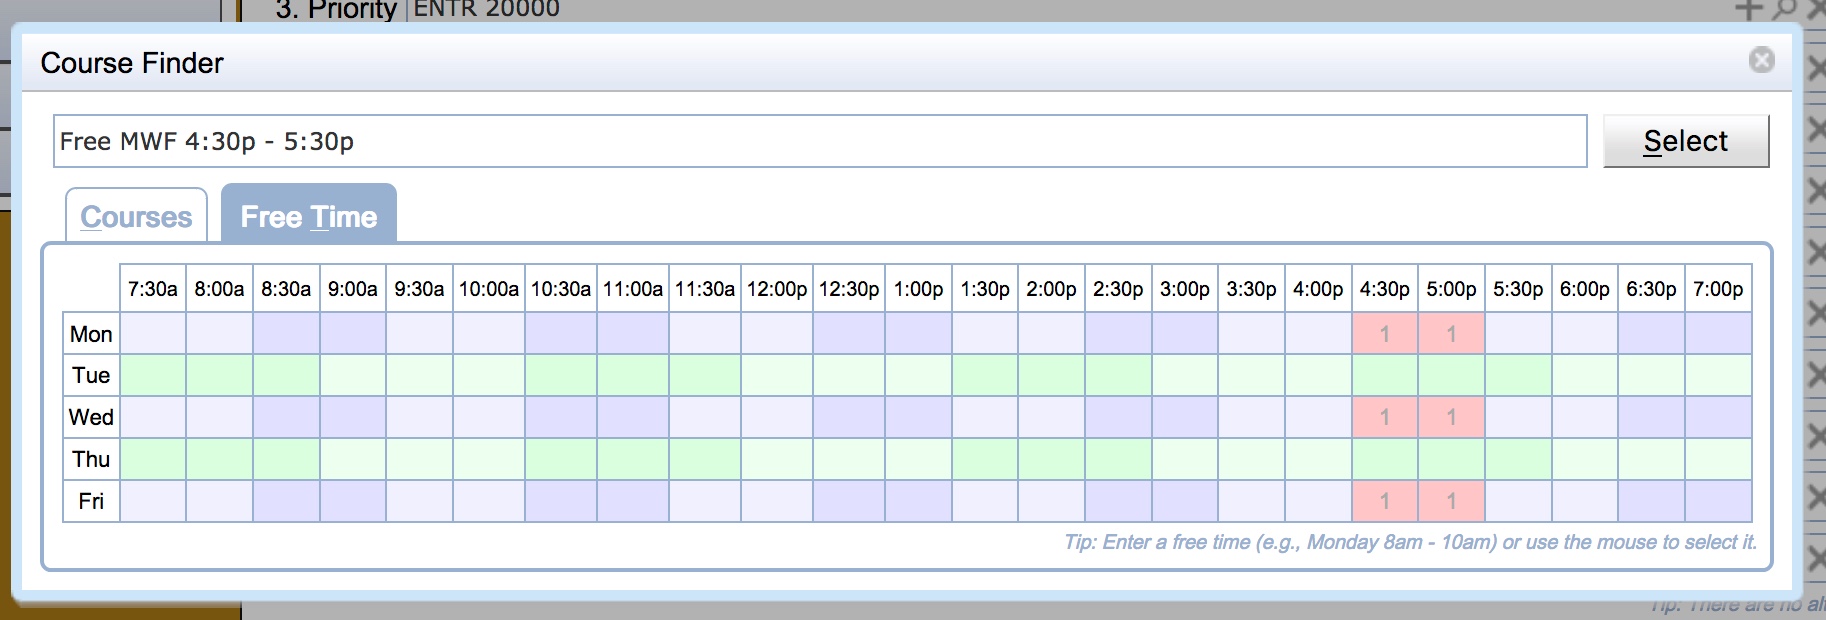
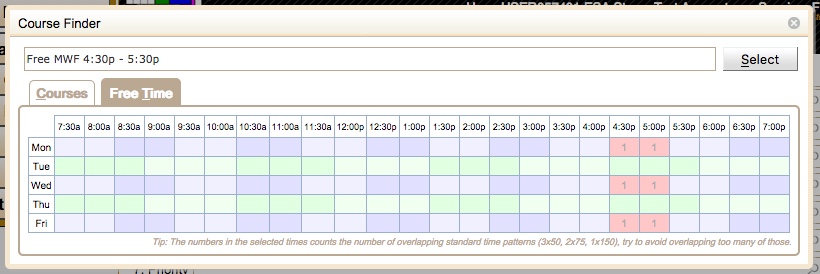
You can also use the magnifying glass icon ![]() to enter free time requests from the course finder dialog. To use the course finder dialog to enter a free time request, select the Free Time tab and click on each half-hour grid square that should be free, and a free time request will be built in the text box. Clicking a grid square a second time deselects it. Press the Select button or use the enter key to insert the free time request into the Course Requests grid.
to enter free time requests from the course finder dialog. To use the course finder dialog to enter a free time request, select the Free Time tab and click on each half-hour grid square that should be free, and a free time request will be built in the text box. Clicking a grid square a second time deselects it. Press the Select button or use the enter key to insert the free time request into the Course Requests grid.
It is also possible to enter free time requests by typing them into the input box and selecting a suggestion.
Free time requests can also be entered directly in the input text box, without opening the Course Finder dialog.
Note: A high-priority free-time request may prevent the UniTime from placing you into a lower-priority course if that course meets during the requested free time. A lower-priority free time will not block the course, but UniTime will still try to avoid it (minimize the overlapping time with a lower-priority free time request).
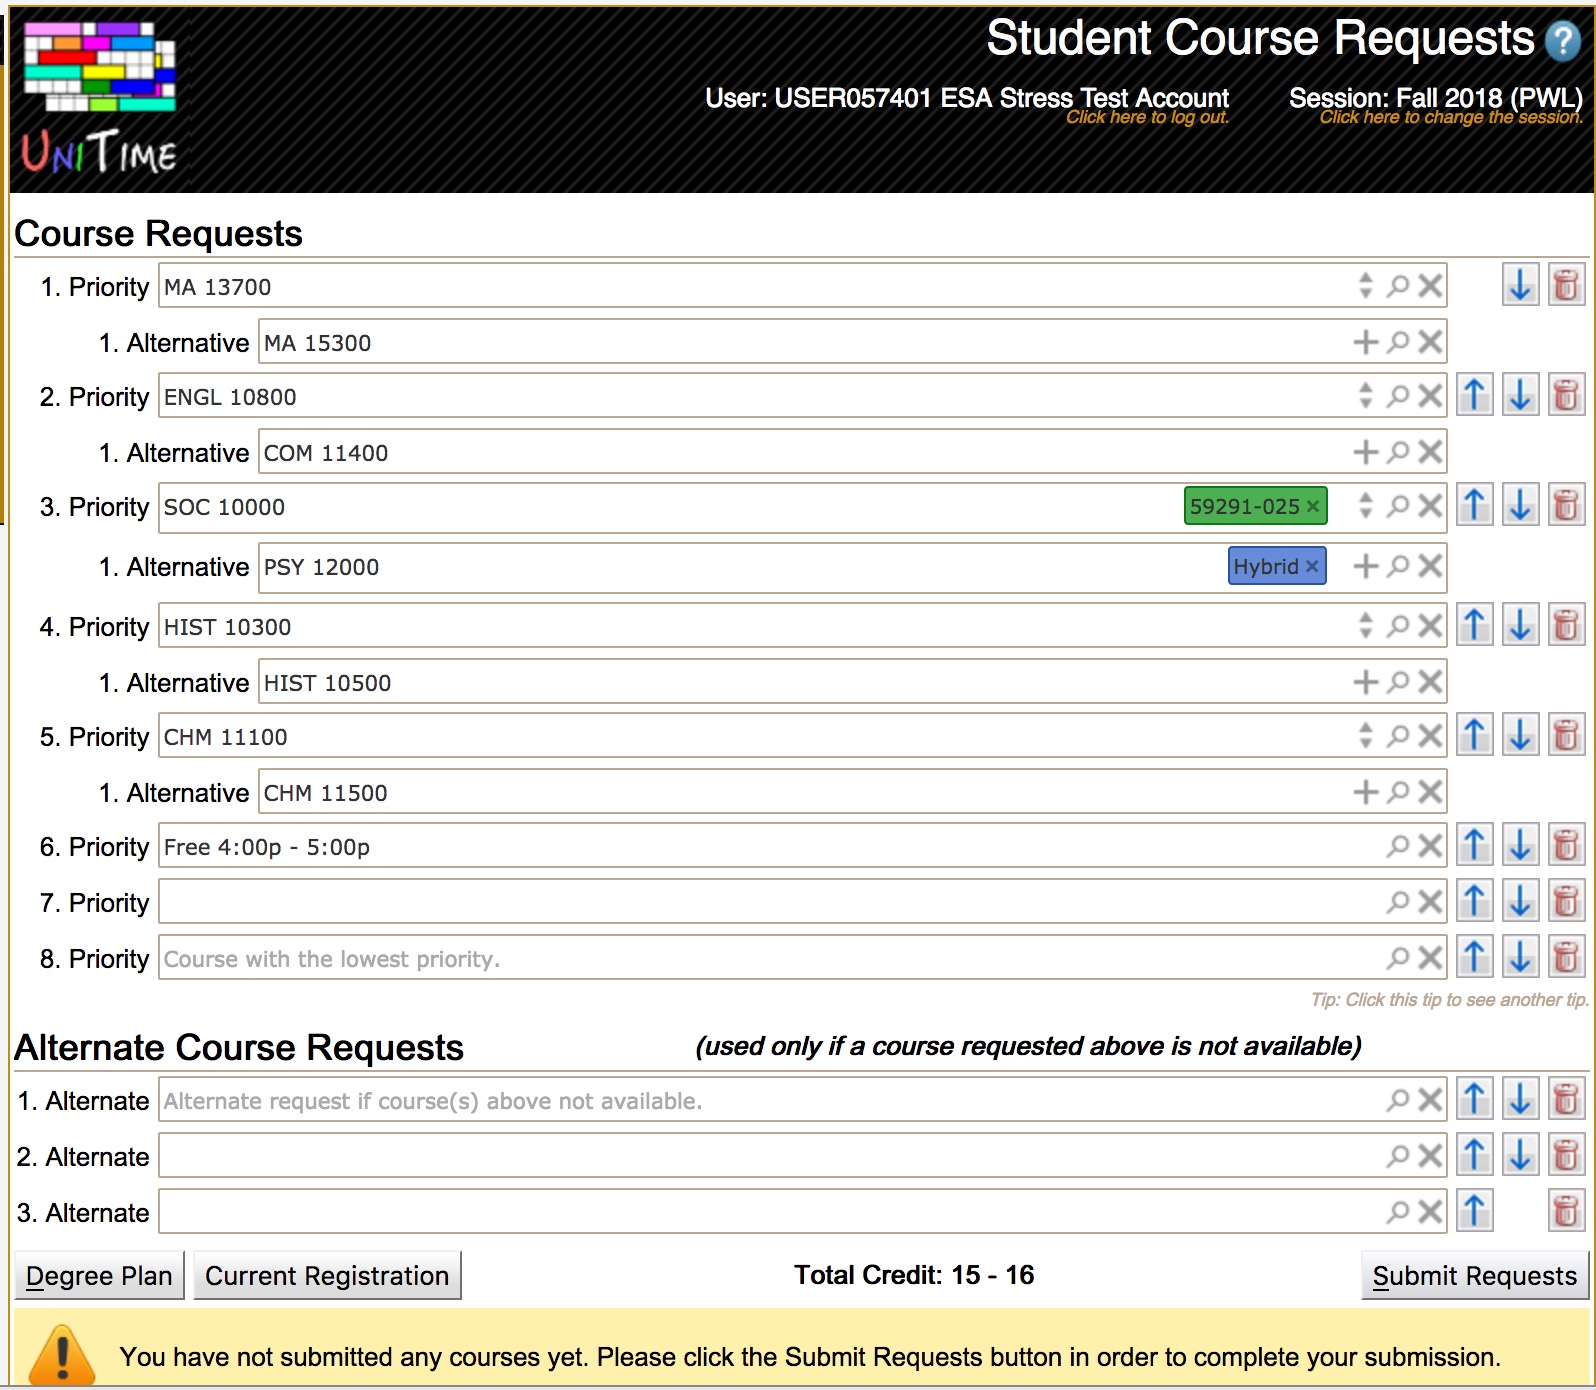
Continue filling in the course request input boxes until you have entered all your course and free time requests.
You can make changes to this list by adding courses to the empty spots in the grid. To remove courses, use the trash can icon ![]() to the right of the line associated with the course. To change priorities, use the up
to the right of the line associated with the course. To change priorities, use the up ![]() and down
and down ![]() arrows. To submit a free time request, use the magnifying glass icon
arrows. To submit a free time request, use the magnifying glass icon ![]() to take you to the Course Finder dialog where you can build a free time request. More experienced users may also enter a time statement covering the desired free time.
to take you to the Course Finder dialog where you can build a free time request. More experienced users may also enter a time statement covering the desired free time.
Once you are satisfied with your course, alternatives, and free time requests, press the Submit Requests button in the bottom right-hand corner of the page.

This triggers UniTime to submit a validation request to determine whether you are eligible to register for the courses listed in your course request. If the validation finds no errors, a dialog will appear acknowledging that the submission was successful and asking if you would like to print a confirmation.
If you select yes, your browser’s print dialog will open, and you can print the confirmation.
Once you have printed your course request submission confirmation, you are returned to the Course Requests Form. If no errors were found, you will see a green check mark ![]() next to each course request. You will also see a message at the bottom of the page stating the course requests were successfully submitted.
next to each course request. You will also see a message at the bottom of the page stating the course requests were successfully submitted.
Validating your course requests may trigger several warnings. If warnings are found, a dialog will appear to let you review them. Items listed in the warnings are informational and will not prevent UniTime from scheduling you into a course.

It is important to review the warnings. To agree to the warnings and submit your course requests, click Accept & Submit or Accept & Continue (whichever is available). To make changes to your course requests to resolve the warnings, click Cancel Submit. When you return to the Course Requests after you click Cancel Submit, the warnings will be displayed in the smaller text under the input box for the affected course.
The validation of your course requests could detect the need for overrides to allow you to be registered to one or more of the courses on your list. If the overrides are not obtained for a course, then that course will be removed from your course requests before your schedule is created. When the need for an override is detected, a dialog is displayed documenting all overrides needed and providing you with the opportunity to decide to request the overrides or change your course requests.

If you have not discussed the courses needing overrides with your advisor or would prefer to edit your course request rather than request the overrides, then press the Cancel Submit button to return to the Course Requests page so you can change your requests. If you have discussed the courses needing overrides with your advisor and believe you will be granted the overrides, then press the Request Overrides & Submit button to request the required overrides and submit your course requests. You can also provide a note for each of the courses that need an override.
Once the course requested have been submitted and the overrides requested you should see the following message at the bottom of the page.
You are done and can leave the page now.
Once a submitted course request exists, additional data about each of the submitted course requests will appear on the course request form.
If there are warnings or override requests associated with a course, then there will be messages beneath the input box associated with the course requests detailing the warnings and/or override requests.

In the input box next to the course, there will be a clickable icon that provides information about the status of the course request.
The clickable icon can also be found next to the total credit to indicate whether a credit increase is not needed, pending, or denied.

Any of the following clickable icons may be displayed depending on the status of the individual course request:
![]() - The course request has been successfully submitted and is ready to be used for building your schedule. Clicking on success
- The course request has been successfully submitted and is ready to be used for building your schedule. Clicking on success ![]() the icon opens a pop-up confirming that the course is part of your current submission.
the icon opens a pop-up confirming that the course is part of your current submission.

![]() - You are already enrolled in the course. Clicking on the lock
- You are already enrolled in the course. Clicking on the lock ![]() icon opens a pop-up confirming that you are currently enrolled in the course and that you cannot change the request.
icon opens a pop-up confirming that you are currently enrolled in the course and that you cannot change the request.

![]() - You have requested overrides that are still awaiting approval. This course is not yet ready to be used for building your schedule. Clicking the waiting
- You have requested overrides that are still awaiting approval. This course is not yet ready to be used for building your schedule. Clicking the waiting ![]() icon brings up a pop-up that lists the overrides that are awaiting approval for the course.
icon brings up a pop-up that lists the overrides that are awaiting approval for the course.

![]() - Your override request has been denied. This course will not be used for building your schedule. Clicking on the denied
- Your override request has been denied. This course will not be used for building your schedule. Clicking on the denied ![]() icon brings up a pop-up that provides more information about the override that has been denied and displays the denial note.
icon brings up a pop-up that provides more information about the override that has been denied and displays the denial note.

General informational messages that apply to the entire Course Requests Form are displayed at the bottom of the Student Course Requests Page.
If your time window for using the Student Course Requests Page is not open, a message will display that lists the window of time you can access the page.

It will also display messages indicating that you still need to submit your changes to your course requests.

If you have a denied override request, it will show a warning advising you to remove the denied course from your request.

If you have successfully submitted your course requests, a message indicating success will appear.
| Back to UniTime Online Documentation | © UniTime 2026 | Content available under GNU Free Documentation License 1.3 |