| Student Scheduling Assistant | |
| Last Updated: January 2026 | |
The Student Scheduling Assistant was created to help students quickly build a workable class schedule. It takes a list of courses a student is interested in and determines the class sections the student needs to take in order to get as many of the courses being requested as possible. The Student Scheduling Assistant tries to calculate a schedule for the student based on the following criteria:
Once the assistant has suggested a schedule, a student can make changes to the schedule until they find a combination of times for the classes that meets their needs.
Note: Many sections only have one or two spaces available in them at any given time. If the Student Scheduling Assistant suggests one of these sections, it is a good idea to submit the schedule quickly by pressing the Submit Schedule button to be registered. This is because the spaces may be taken by another student since the assistant does not block other students from registering for a suggested section.
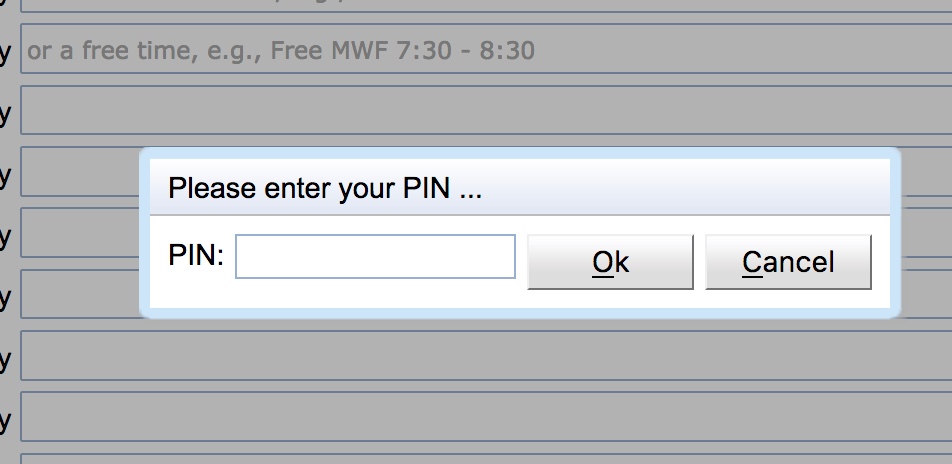
To use the Scheduling Assistant, open UniTime, login, and select Scheduling Assistant in the menu.

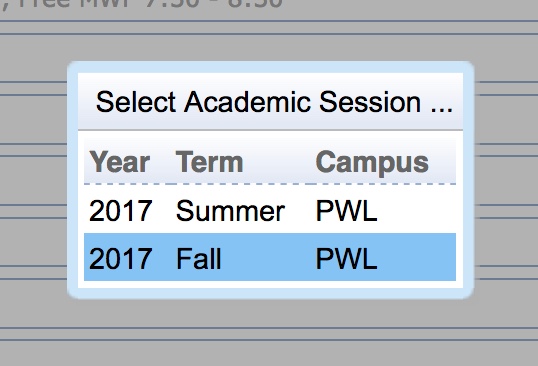
If there are multiple terms available for scheduling, a dialog with term choices will appear. Select the term in which you want to register.
The term in the upper right-hand corner will reflect the term you selected.
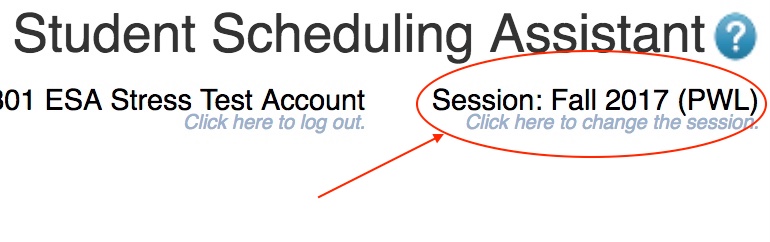
If the term listed is incorrect, click on the term that is listed.
Depending on the status of your course registration, there are two possible screens you may be taken to when you enter the Scheduling Assistant.
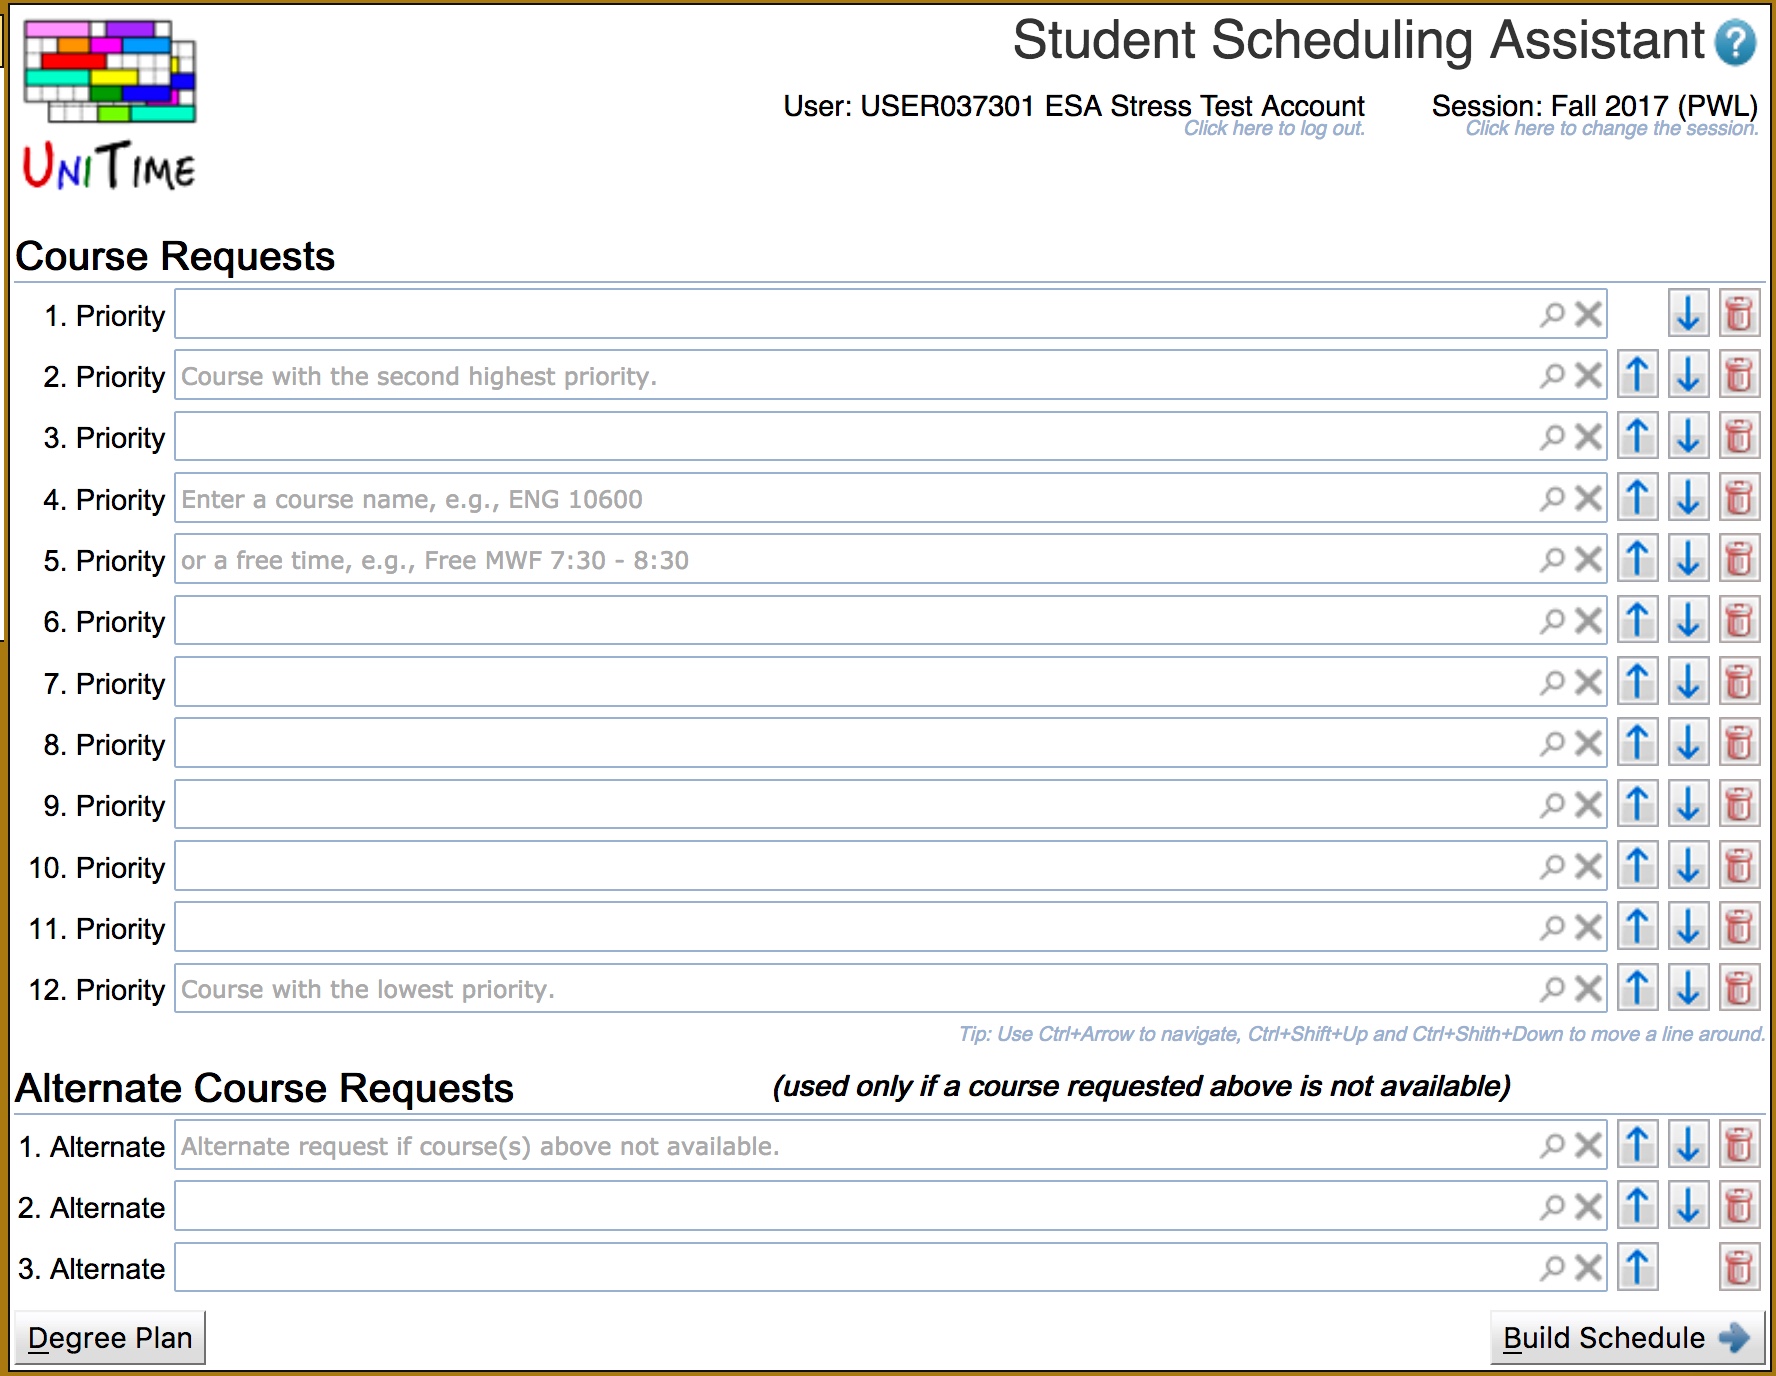
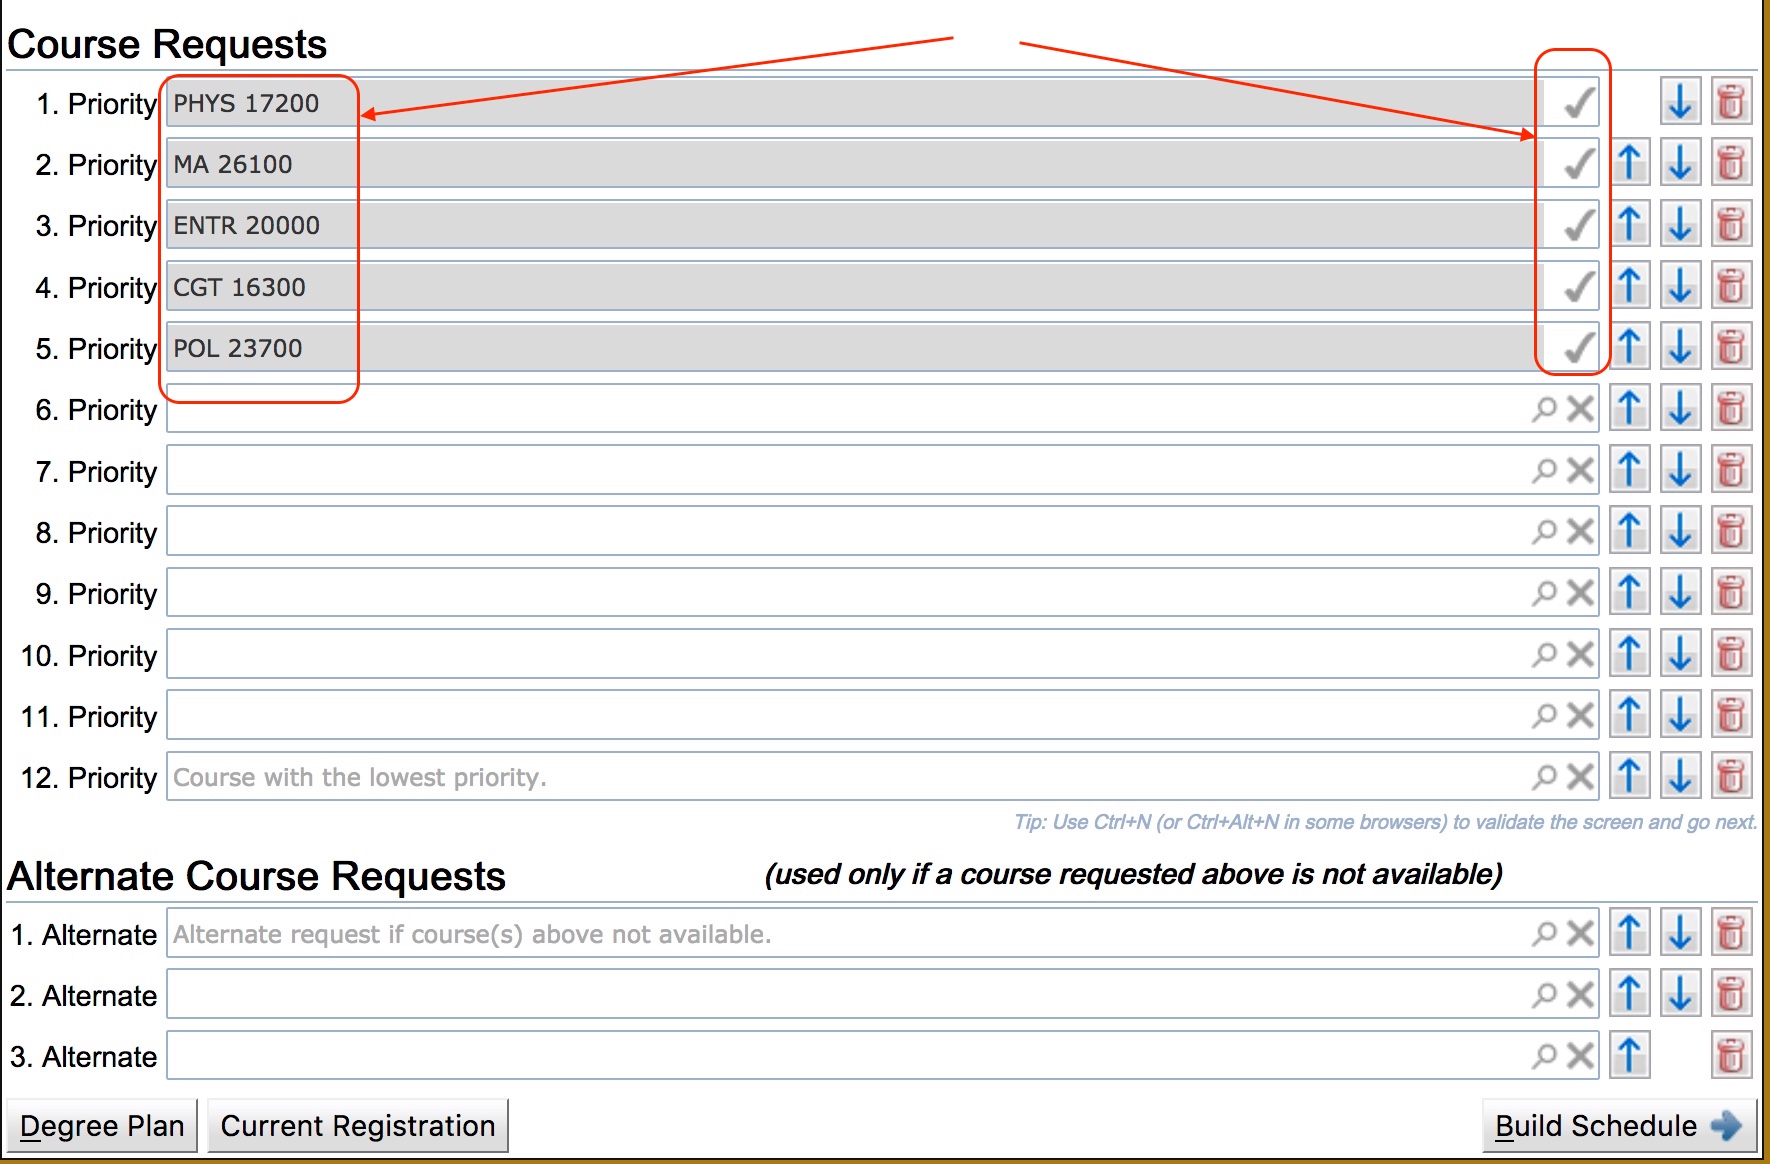
If you have not previously registered for any courses, the Student Scheduling Assistant will display the Course Requests grid for entering your course requests.
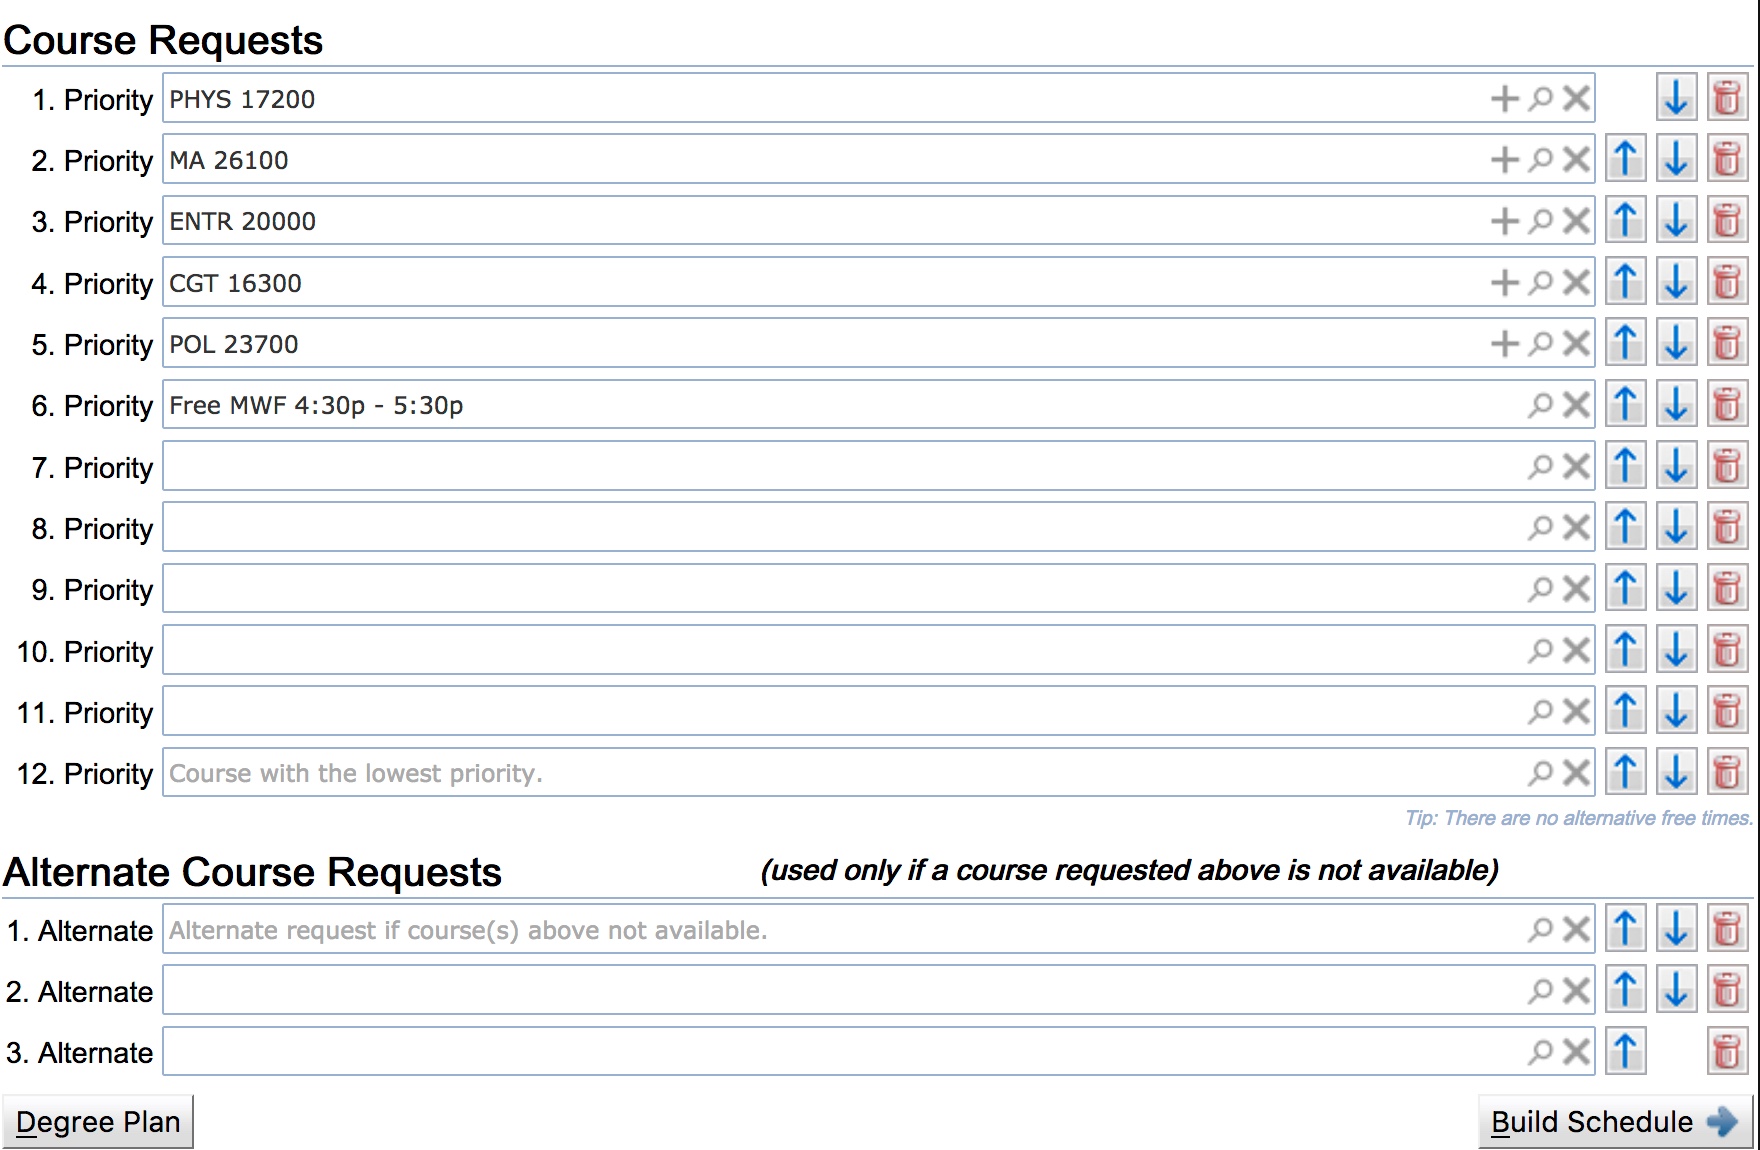
Enter all courses you wish to take in the Course Requests table. You should enter the courses in descending order from your highest priority to your lowest priority. If there is an alternative to any specific course you want to take, you can enter that information by using the ![]() sign in the text box with the course. This will add an indented line underneath the course request that can be used to enter an alternative course request. The
sign in the text box with the course. This will add an indented line underneath the course request that can be used to enter an alternative course request. The ![]() sign can be selected as many times as needed. Also, if you want to take a specific number of courses in order to make progress toward a degree, you may request a set of alternative courses that are acceptable if any course in the prioritized list is not available.
sign can be selected as many times as needed. Also, if you want to take a specific number of courses in order to make progress toward a degree, you may request a set of alternative courses that are acceptable if any course in the prioritized list is not available.
From the Course Requests grid, you can add courses to your list by clicking the magnifying glass icon ![]() . This opens a dialog that lets you search for courses. You can enter a course number or a set of words that may be found in the title of the course. The Course Finder dialog will display a set of courses that match your search criteria. You can click each course listed to see more details in the course catalog.
. This opens a dialog that lets you search for courses. You can enter a course number or a set of words that may be found in the title of the course. The Course Finder dialog will display a set of courses that match your search criteria. You can click each course listed to see more details in the course catalog.

Note 1: Multiple courses can be selected using the checkboxes next to each course in order to provide alternatives. The courses will be listed in the order they have been toggled.

Note 2: The ![]() Filter can be opened by clicking the
Filter can be opened by clicking the ![]() icon, allowing for filtering the course by their dates (useful for Summer and Winter sessions), credits, and instructors.
icon, allowing for filtering the course by their dates (useful for Summer and Winter sessions), credits, and instructors.

Note 3: The checkboxes next to the instructional methods (when there are multiple) or individual sections can be used to provide preferences. When the Selection Required box is checked, only enrollments meeting the selected preferences can be returned.

Once you have found the course you are looking for, double-click the course to select it, or hit the Select button. This closes the window and populates the appropriate field in the Course Requests grid.
In addition to using the magnifying glass icon ![]() to bring up the Course Finder dialog. You can type your search directly into the input box, and it will show a drop-down list of courses that match your search criteria. You can then select a course from the drop-down.
to bring up the Course Finder dialog. You can type your search directly into the input box, and it will show a drop-down list of courses that match your search criteria. You can then select a course from the drop-down.

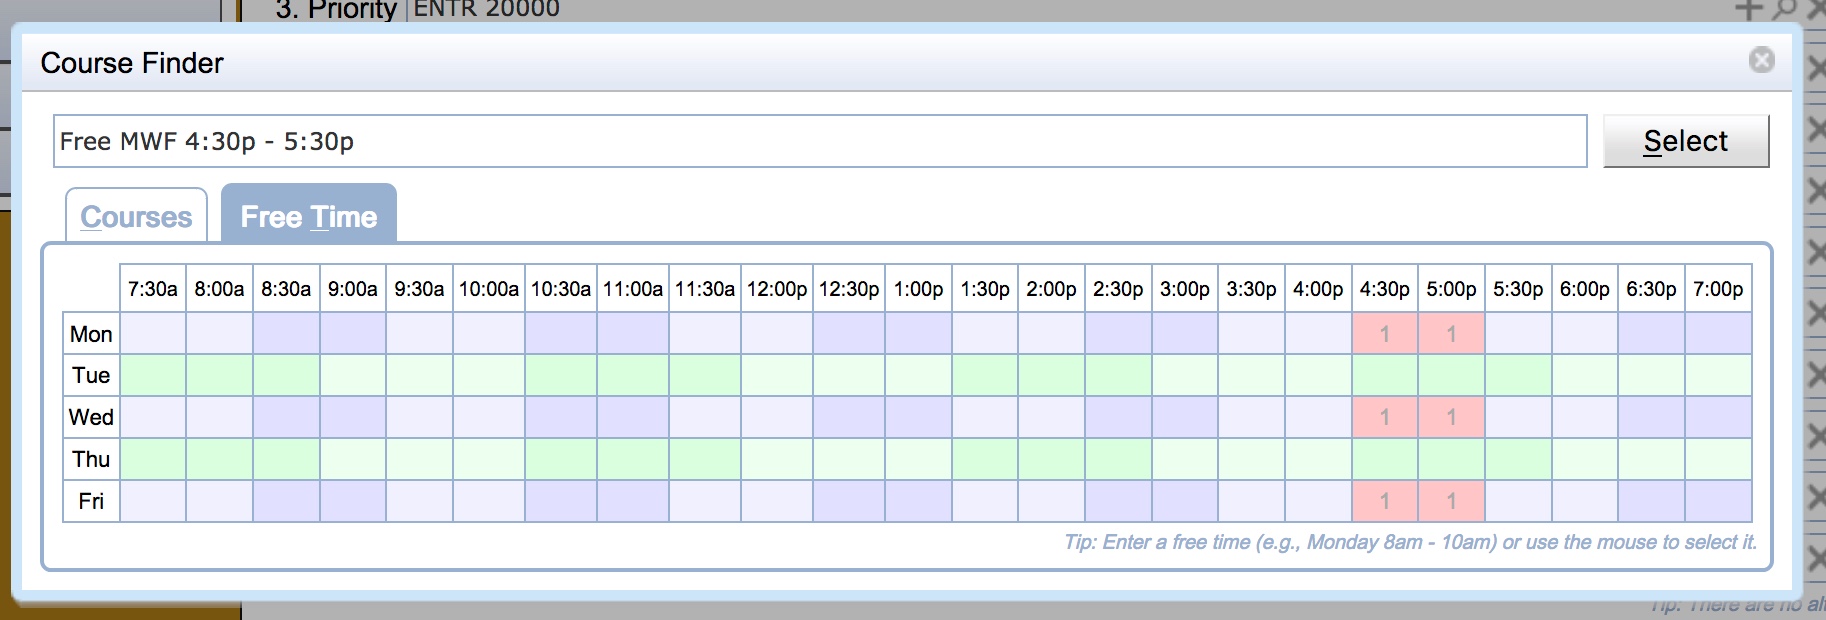
You can also use the magnifying glass icon ![]() to enter free time requests from the course finder dialog. To use the course finder dialog to enter a free time request, select the Free Time tab and click on each half-hour grid square that should be free, and a free time request will be built in the text box. Clicking a grid square a second time deselects it. Press the Select button or use the enter key to insert the free time request into the Course Requests grid.
to enter free time requests from the course finder dialog. To use the course finder dialog to enter a free time request, select the Free Time tab and click on each half-hour grid square that should be free, and a free time request will be built in the text box. Clicking a grid square a second time deselects it. Press the Select button or use the enter key to insert the free time request into the Course Requests grid.
It is also possible to enter free time requests by typing them into the input box and selecting a suggestion.
Note: A high-priority free-time request may prevent the Student Scheduling Assistant from placing you into a lower-priority course if that course meets during the requested free time.
Continue filling in the course request input boxes until you have entered all your course and free time requests.
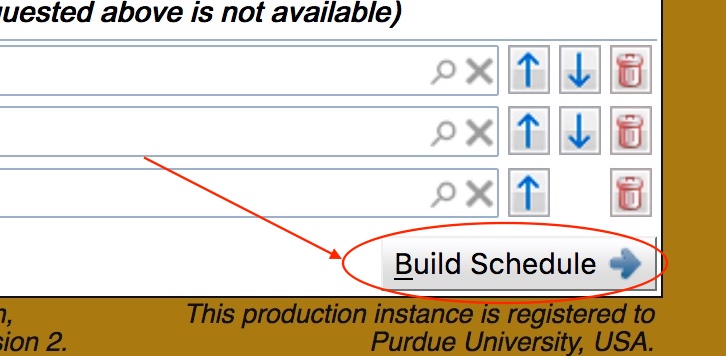
Once you have entered your course and free time requests, press the Build Schedule ![]() button to get a suggested schedule.
button to get a suggested schedule.
If you have an existing schedule, you will be shown your current list of classes.
If you wish to add or remove courses from your schedule, you can navigate to the Course Requests grid as described below.
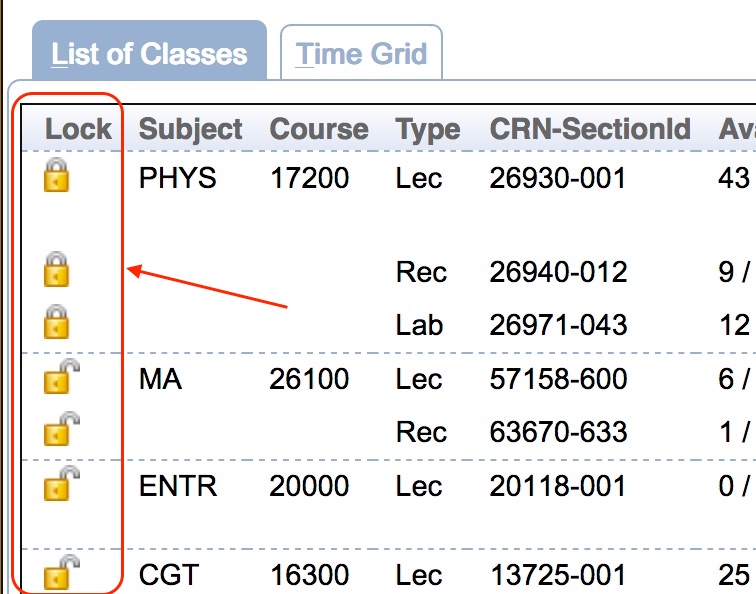
When adding classes to an existing schedule, the scheduling assistant tries to retain existing time placements; however, it may move class times to provide a more complete schedule. Because of this, if you wish to guarantee that a time is retained on a particular class, you should select the lock icon ![]() next to that class before navigating to the Course Requests grid.
next to that class before navigating to the Course Requests grid.
Note: If you have been administratively pre-enrolled in courses such as those affiliated with learning communities, it is strongly recommended that you lock all associated courses to ensure the assistant does not try to move you into a different section before navigating to the Course Requests grid.
To navigate to the Course Requests grid and modify your course request, select the ![]() Course Request button.
Course Request button.
You can make changes to this list by adding courses to the empty spots in the grid. To remove courses, use the trashcan icon ![]() to the right of the line associated with the course. To change priorities, use the up
to the right of the line associated with the course. To change priorities, use the up ![]() and down
and down ![]() arrows. To submit a free time request, use the magnifying glass icon
arrows. To submit a free time request, use the magnifying glass icon ![]() to take you to the Course Finder dialog where you can build a free time request. More experienced users may also enter a time statement covering the desired free time.
to take you to the Course Finder dialog where you can build a free time request. More experienced users may also enter a time statement covering the desired free time.
For more detailed information on the actions you can take on the Course Requests grid, see Case 1 above.
Note: Course that you are currently not registered in are CROSSED OUT. To re-enable such a course, click the recycle icon ![]() next to the course.
next to the course.
Once you have modified your course and free time requests, press the Build Schedule ![→] (../images/icon-right.png) button in the bottom right-hand corner of the page to get a suggested schedule.
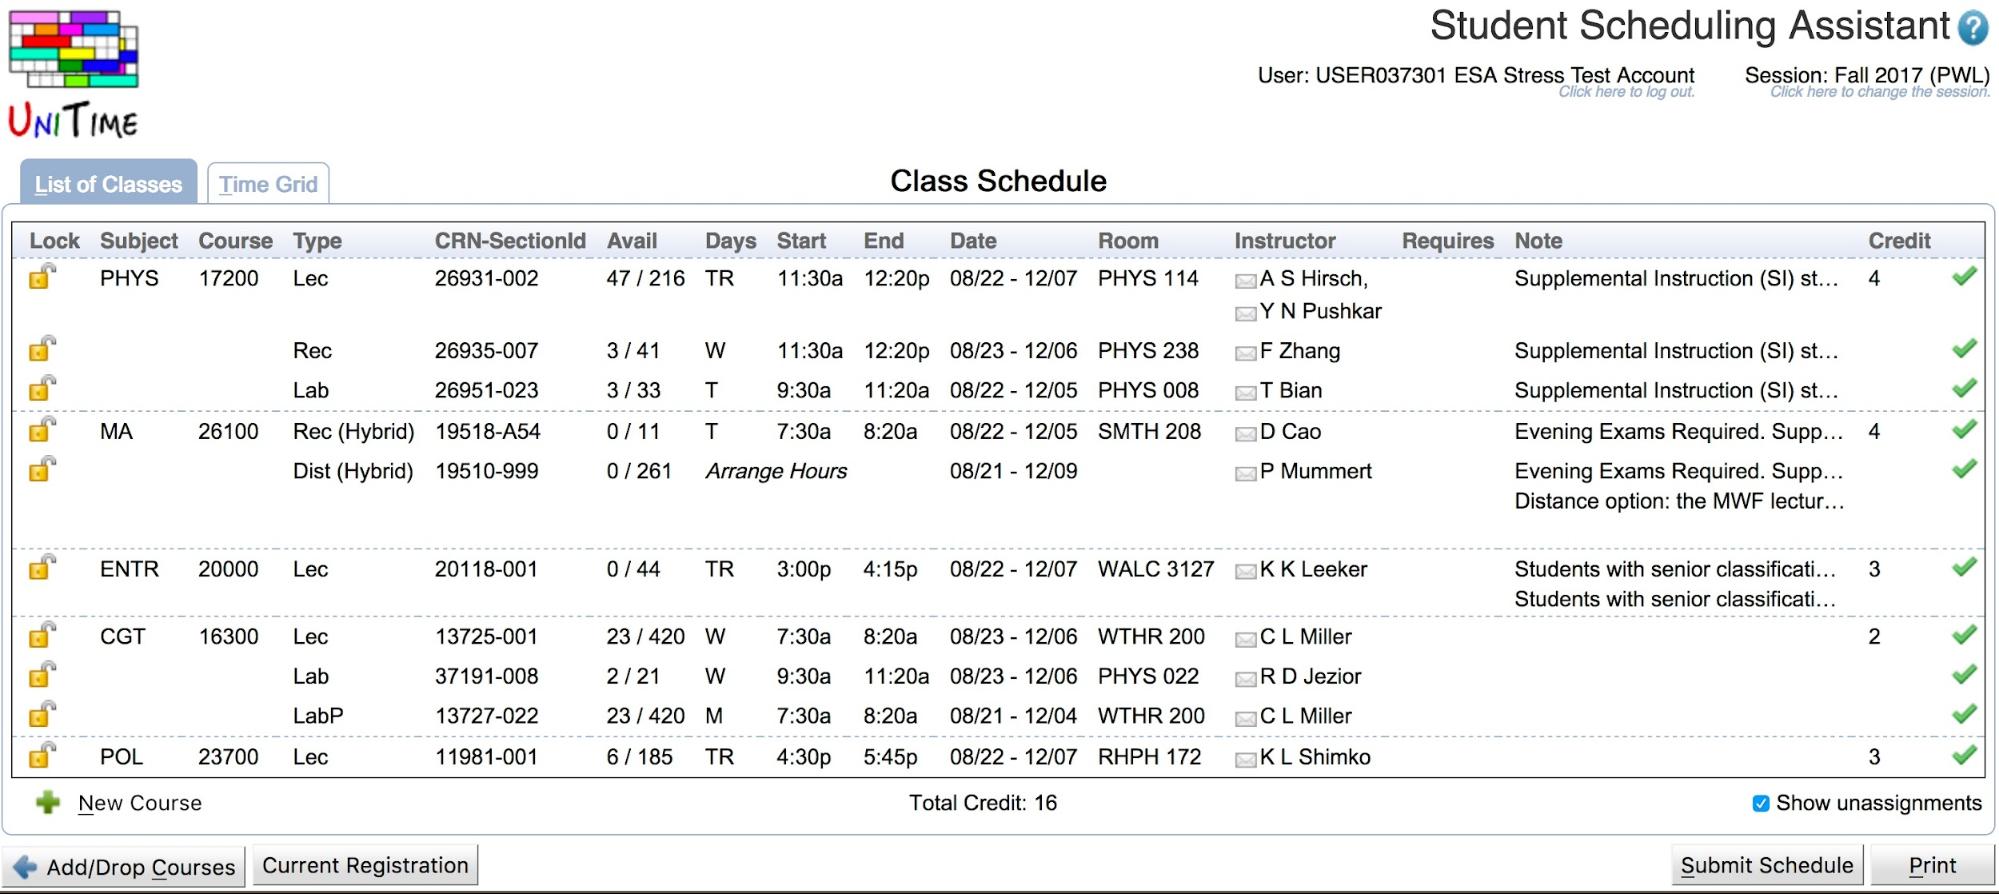
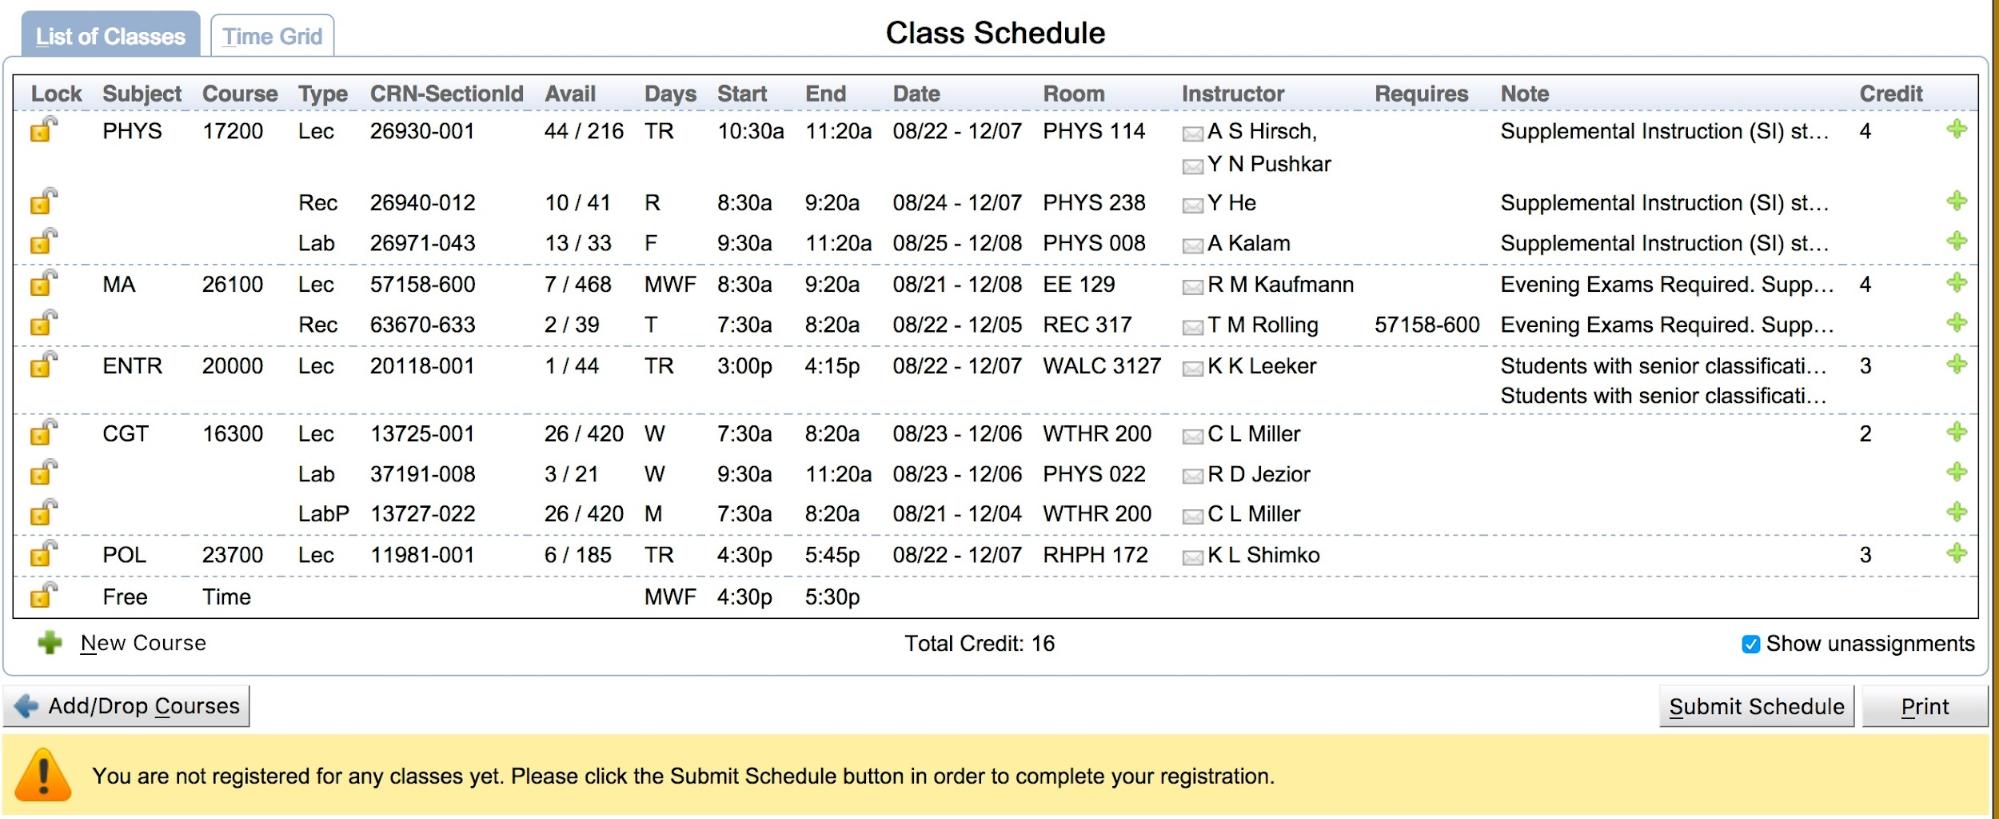
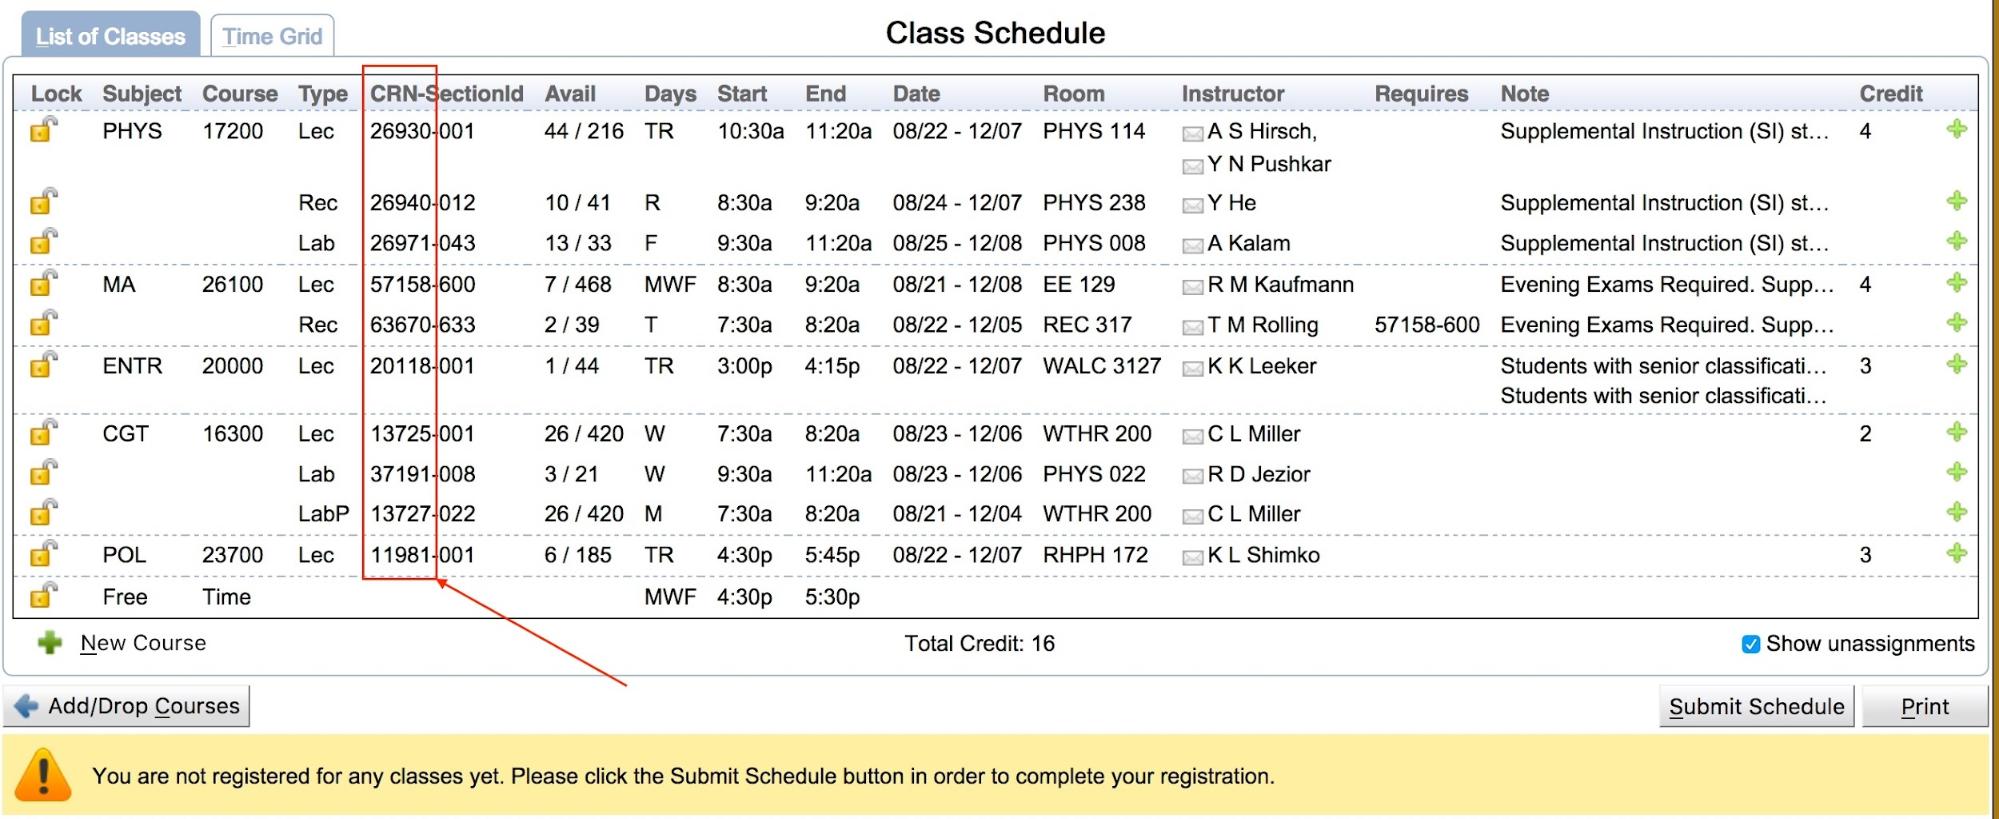
Once you have a suggested schedule, note the number of available spaces in each class.

The Avail column on the List of Classes tab of the Class Schedule shows how many seats are still available out of the total seats for a section. If a class is filling up and the time is acceptable to you, you should complete registration for the class quickly by pressing the Submit Schedule button in the bottom right-hand corner of the page so that you are officially enrolled in that class. Otherwise, other students seeking this class may enroll in the last available space ahead of you.
Note: If a class requires permission from an instructor or department, it will be noted in the Requires column for that class. The permission must be recorded in the system before you can successfully enroll in the class.
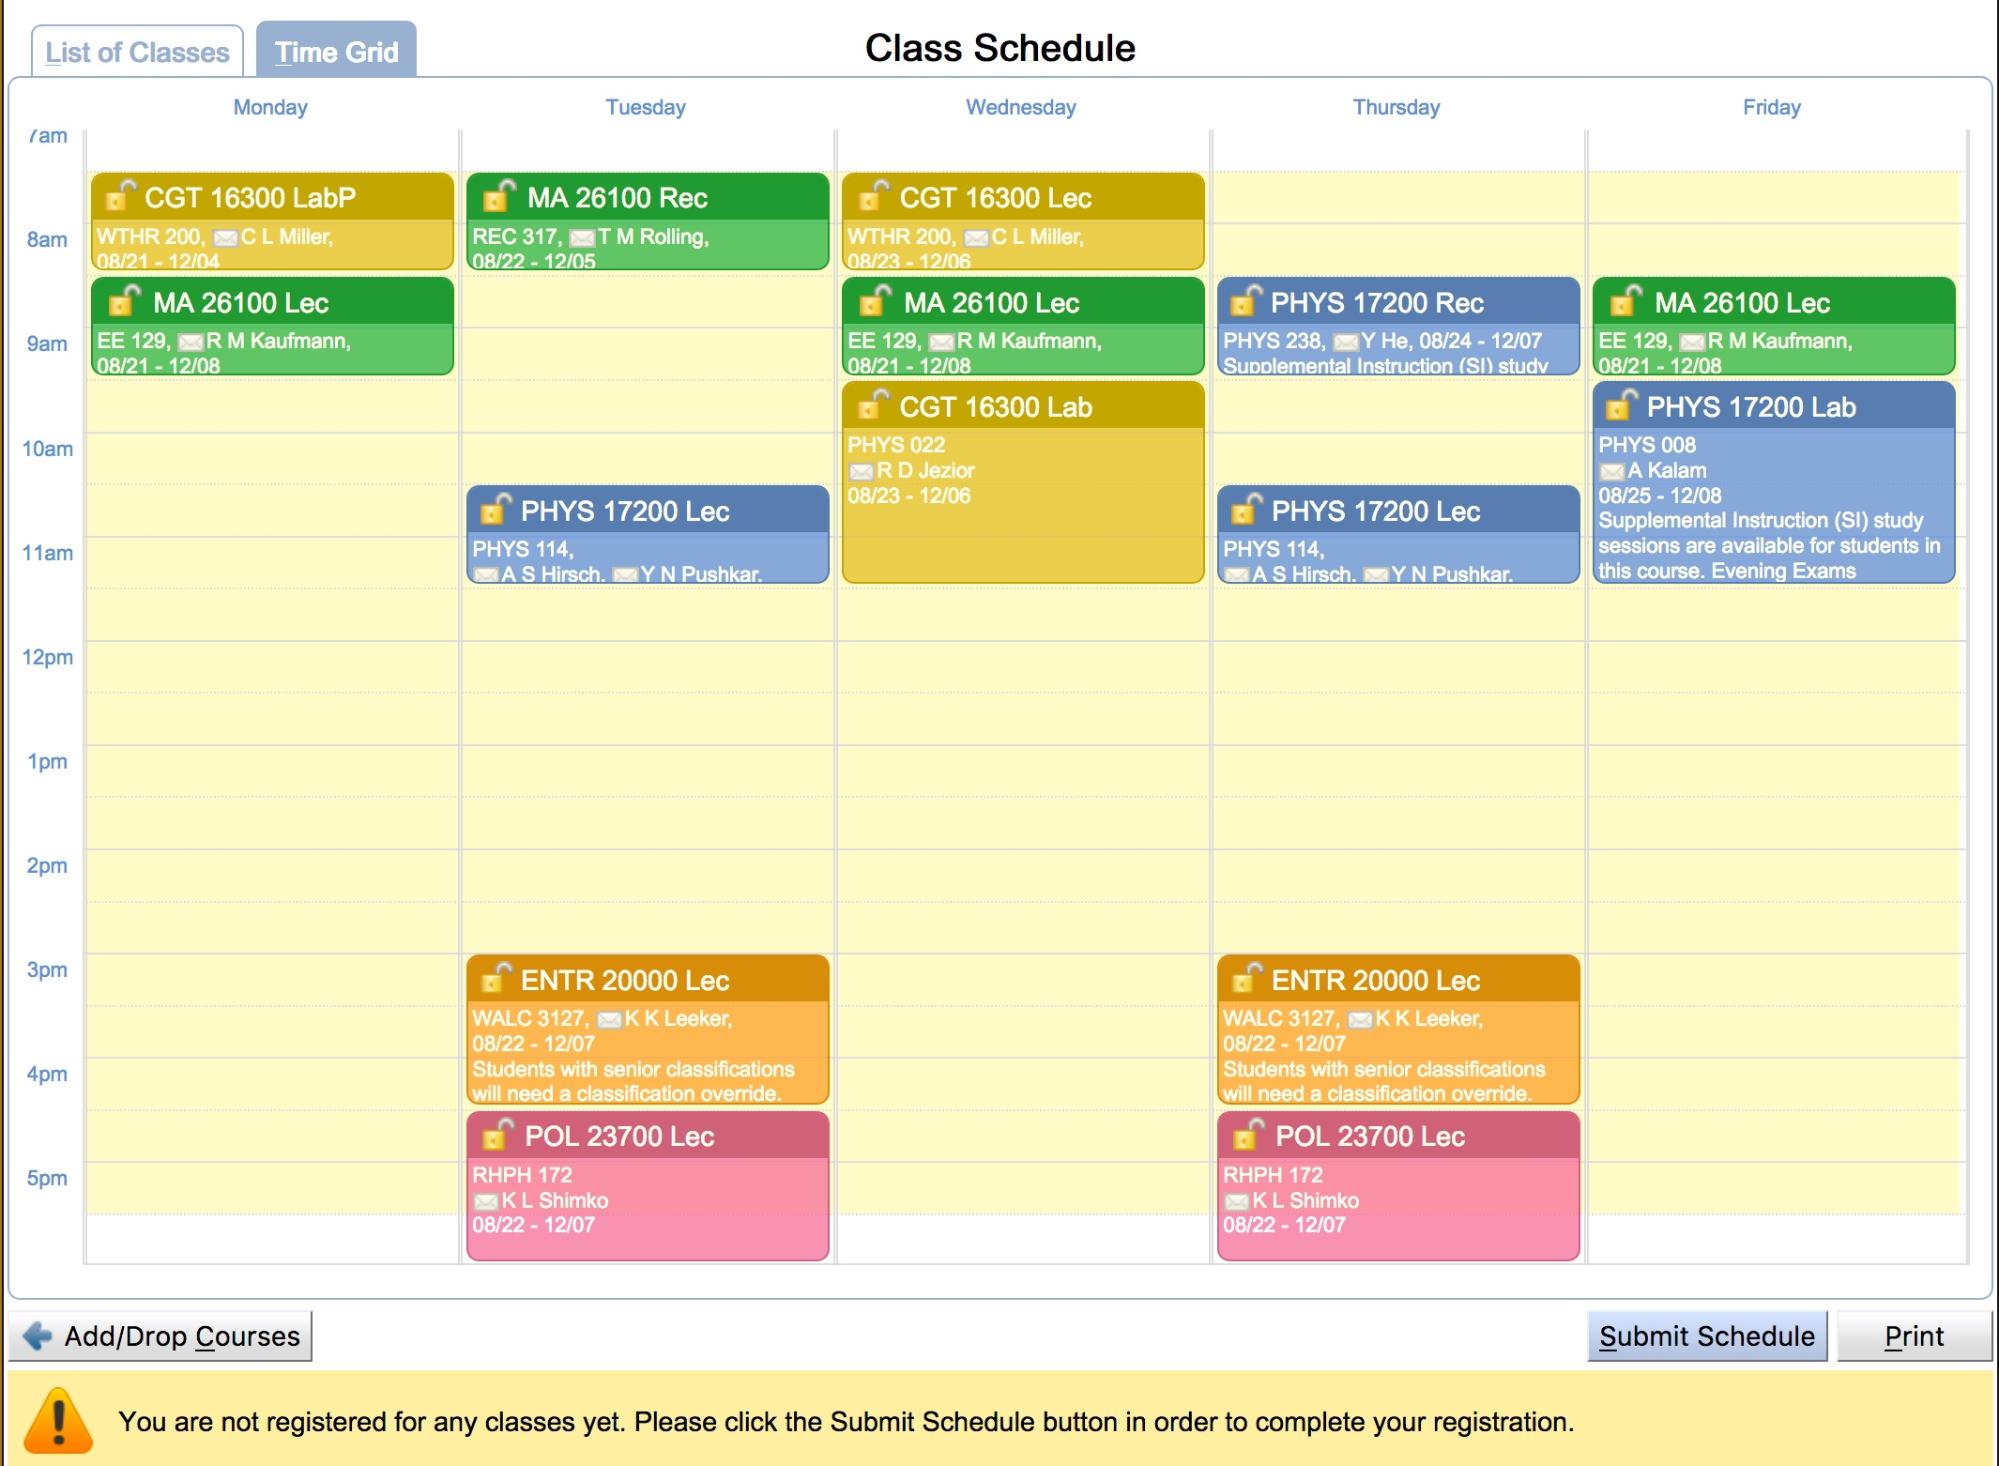
You can also view your suggested schedule as a time grid by selecting the Time Grid tab.
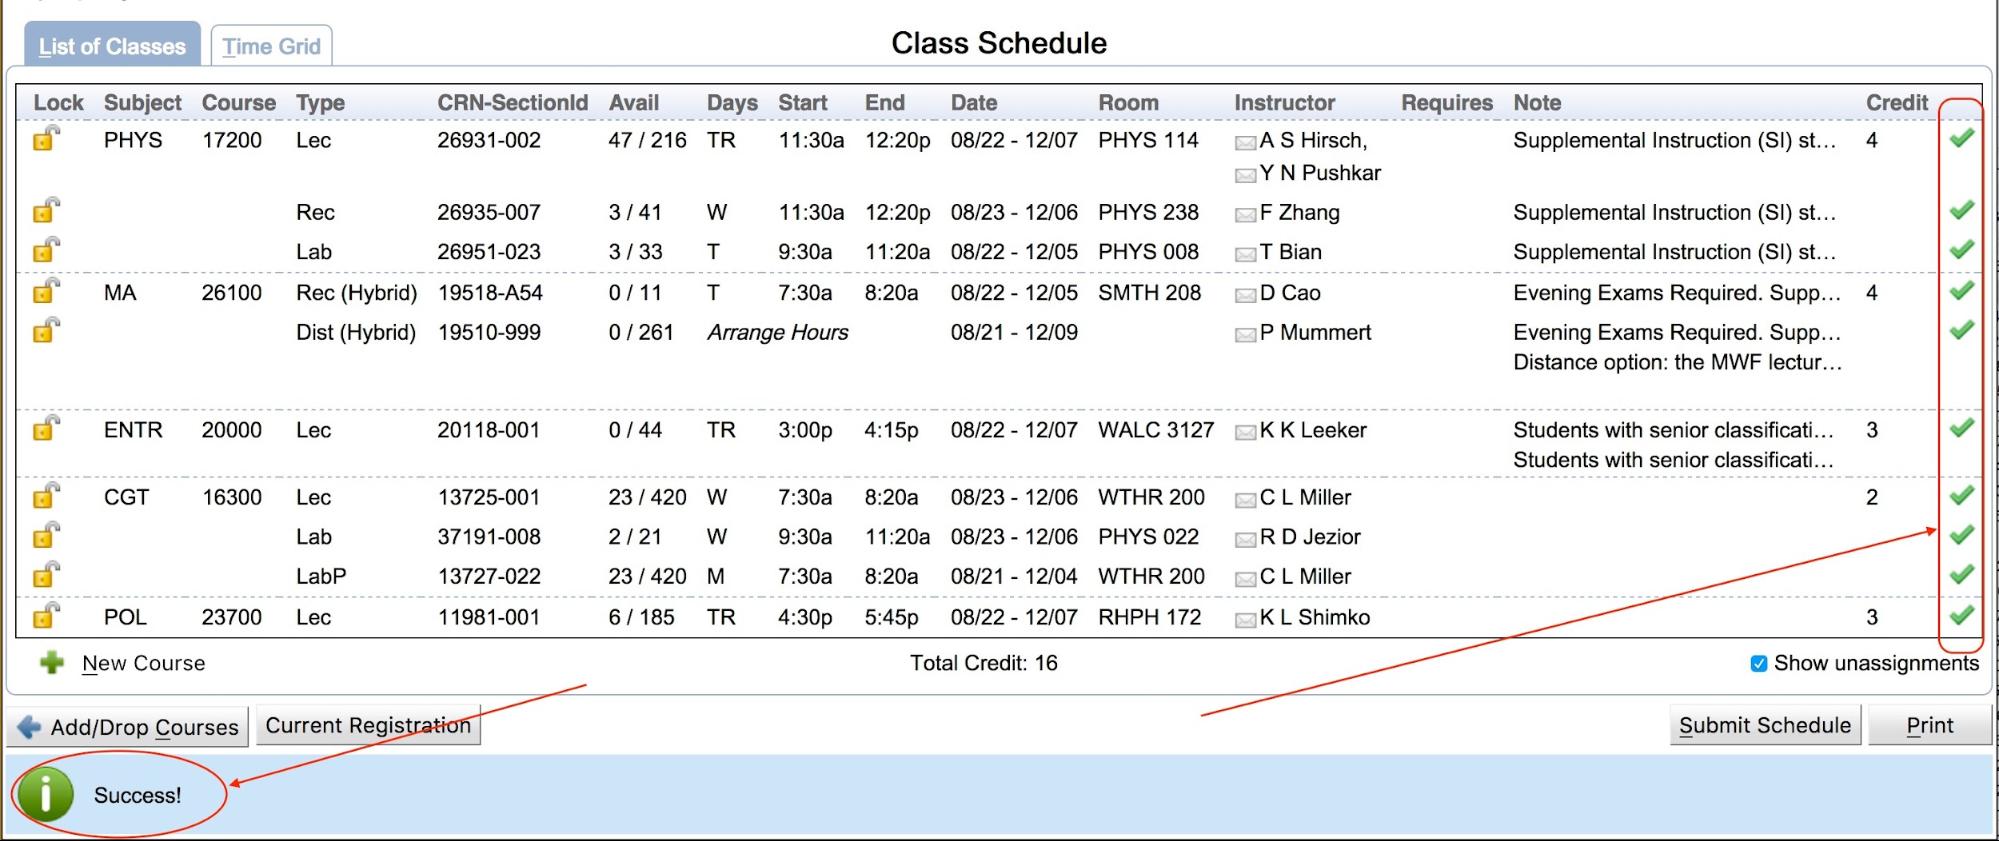
Review the suggested schedule. If you are happy with the schedule, press the Submit Schedule button. If all sections were successfully enrolled, you will see a Success! message, and each section will have a green checkmark ![]() listed next to it. Sections that failed the validation will show a red exclamation mark icon
listed next to it. Sections that failed the validation will show a red exclamation mark icon ![]() next to them. Clicking the icon will also show the corresponding registration error.
next to them. Clicking the icon will also show the corresponding registration error.

Note: If you receive an error message rather than a Success! message, it is your responsibility to look at the error message and take the appropriate action. If you are unsure what action to take, consult your academic advisor.
If you wish to make changes to your schedule, first decide which classes you want to keep at the suggested time. Any such classes should be locked. This can be done on the List of Classes tab by clicking the lock icon ![]() next to a class. You do not have to lock any of the classes.
next to a class. You do not have to lock any of the classes.

It is also possible to lock a class on the Time Grid tab by clicking the lock icon ![]() .
.
Classes can be unlocked at any time by clicking the lock icon a second time.
If you want to change the courses in your suggested schedule, you can press the ![]() Add/Drop Courses button and go back to the Course Requests grid.
Add/Drop Courses button and go back to the Course Requests grid.
Another method for adding a course to your schedule is to click the green plus icon ![]() with the New Course label next to it at the bottom left of the List of Classes tab.
with the New Course label next to it at the bottom left of the List of Classes tab.

This will bring up the new course selection dialog.

Once you have selected the course you want to add, you will be taken to the Choices dialog, which shows you the options for adding the course to your schedule. The course you are adding will be shown in blue. If there are any changes to the schedule for other courses, they will be shown in black. Any courses removed from the schedule will be shown in red. To complete the course addition, select the option you want.

It is also possible to delete a course from your schedule by clicking a section of the course on the List Of Classes tab or the Time Grid tab and selecting the Drop button in the Alternatives dialog.

If you want to discard all current changes and see the courses you are currently registered for, press the Current Registration button.

Note: Clicking on the Current Registration button will discard any unsubmitted changes you have made to your schedule.
To change the time or location of a class, click on the class, and the Student Scheduling Assistant will provide you with a list of alternatives for changes that can be made to move the class.
This list may include alternatives that shuffle one or more classes, in addition to the selected individual class. If you do not like any of the alternatives, you can click outside the window or the close icon ![]() and no changes will be made to your suggested schedule. If you like one of the alternatives, you can click on it, and your proposed schedule will be updated to reflect the change.
and no changes will be made to your suggested schedule. If you like one of the alternatives, you can click on it, and your proposed schedule will be updated to reflect the change.
Notes:
When you mouse over an alternative, a pop-up of the schedule grid showing the complete schedule with the change will be displayed.
Once you have selected a change, you are returned to the Time Grid or List of Classes tab, and your schedule is updated with the selection.
If you are already registered for classes and making changes to your suggested schedule, you will see both the added and removed classes in the List of Classes tab. The added classes have a green plus icon ![]() in the last column. The unchanged classes have a green check icon
in the last column. The unchanged classes have a green check icon ![]() in the last column. The removed classes are in greyed-italic font and have a red cross icon
in the last column. The removed classes are in greyed-italic font and have a red cross icon ![]() in the last column.
in the last column.

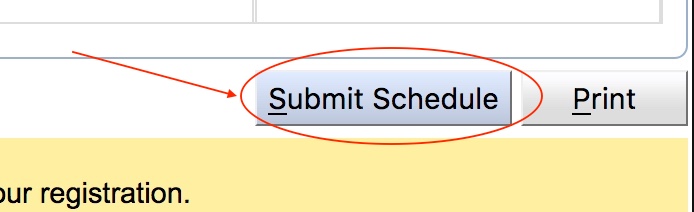
Important: No changes are made to your schedule without clicking the Submit Schedule button. This is also reflected in the displayed warning!

When you see the Success! message, you are done and can leave the page now.
If you want a printed copy of your schedule, press the Print button in the lower right-hand corner, and it will print to the local printer. If a printed copy is not needed, you can log out of the system.
The print output formats your suggested schedule grid and class list into one document.
If you would like to subscribe to a calendar feed of your schedule in UniTime, select the Personal Schedule menu item.
Once you are on the Personal Schedule page, select the Export button on the right-hand side of the page above the schedule.

This will display a menu of exports that can be run for your personal schedule. Select the Export iCalendar item from the list of options displayed.
A dialog will appear with a URL that can be used with your calendar tool of choice to subscribe to your personal schedule for the academic term. Follow your calendaring tool’s instructions for subscribing to the calendar URL provided.

Note: Subscribing to the URL provided rather than just importing it into your calendar allows your calendar to be automatically updated if changes are made to the courses in your schedule and when evening and final exams are published.
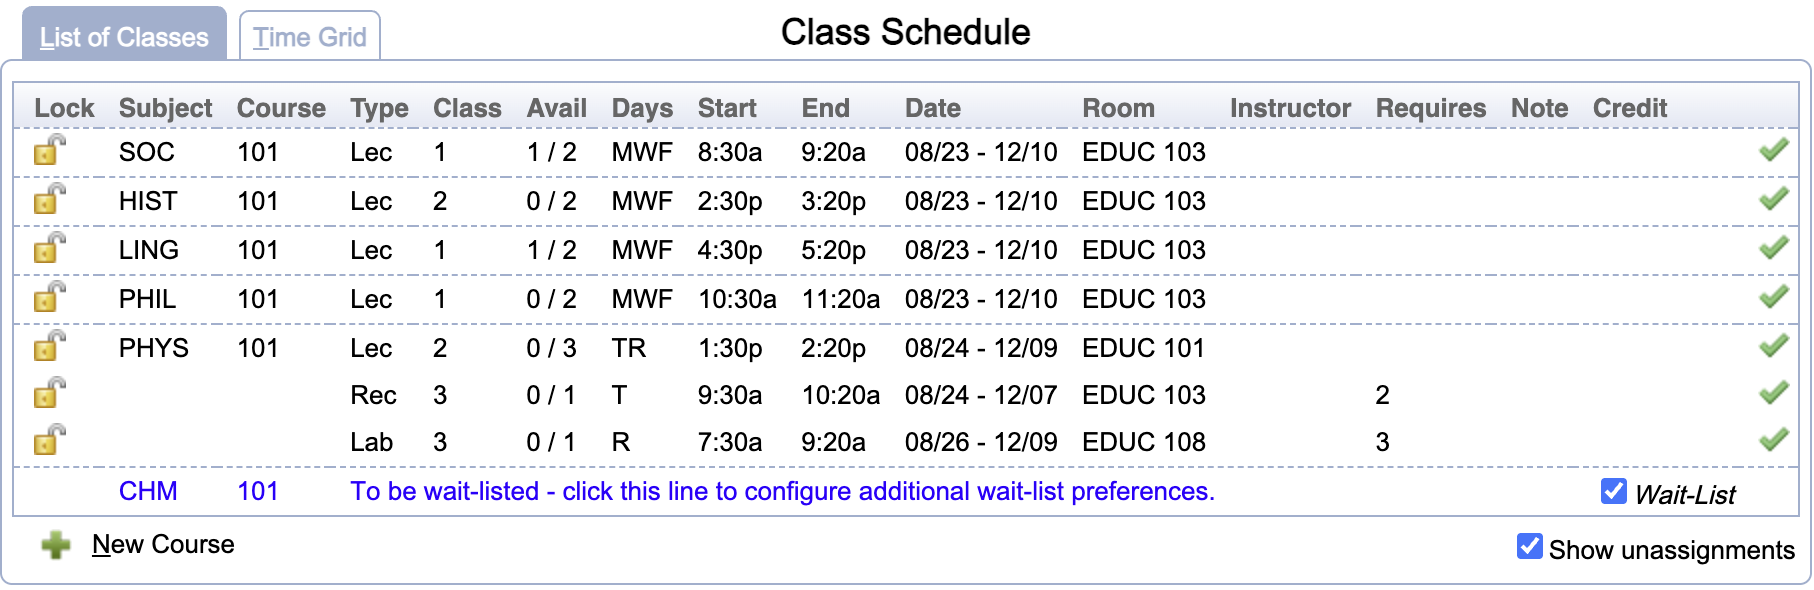
If a course and the student status allow for wait-listing, it can be wait-listed on the Course Requests table using the Wait-List checkbox. Suppose the course is not available for the student, e.g., because it is full. In that case, it can also be wait-listed on the List of Classes (using the Wait-List checkbox on the line with the course) or on the Alternatives dialog when the course/class is clicked (using the Wait-List button).
Additional properties can be entered on the Wait-List Preferences dialog when the wait-listed course is clicked from the List of Classes table.
Do not forget to click the Submit Schedule to persist your changes, including wait-listing the selected course(s) and/or updating your wait-listing preferences. Once submitted, the wait-listed courses will also appear in a separate table below the Class Schedule. Clicking on a wait-listed course in this table will also open the Wait-List Preferences for the course.

It is possible to wait-list for a course swap or a different section of the same course. In this case, the enrolled course that is to be replaced with the wait-listed course is selected on the Wait-List Preferences dialog. The original course is then also listed in the Wait-Listed Courses table (Replaces column).
If the wait-listed course has alternatives provided on the Course Requests, these courses are also being wait-listed if they allow for wait-listing. That is, if space becomes available for the student in the alternative course before there is space available in the first-choice course, UniTime will enroll the student in the alternative course instead. The alternative courses are also listed in the Wait-Listed Courses table and in the Wait-List Preferences dialog.
It is possible that a course to be wait-listed requires some overrides. If that is the case, you will be given the option to request the necessary approvals in order to wait-list the course using the Registration Workflow when you click the Submit Schedule button. The wait-list will not be active until the approval is requested and given, but your position on the wait-list is determined by when the wait-list was created.
| Back to UniTime Online Documentation | © UniTime 2026 | Content available under GNU Free Documentation License 1.3 |