Edit Scheduling Subpart
Screen Description
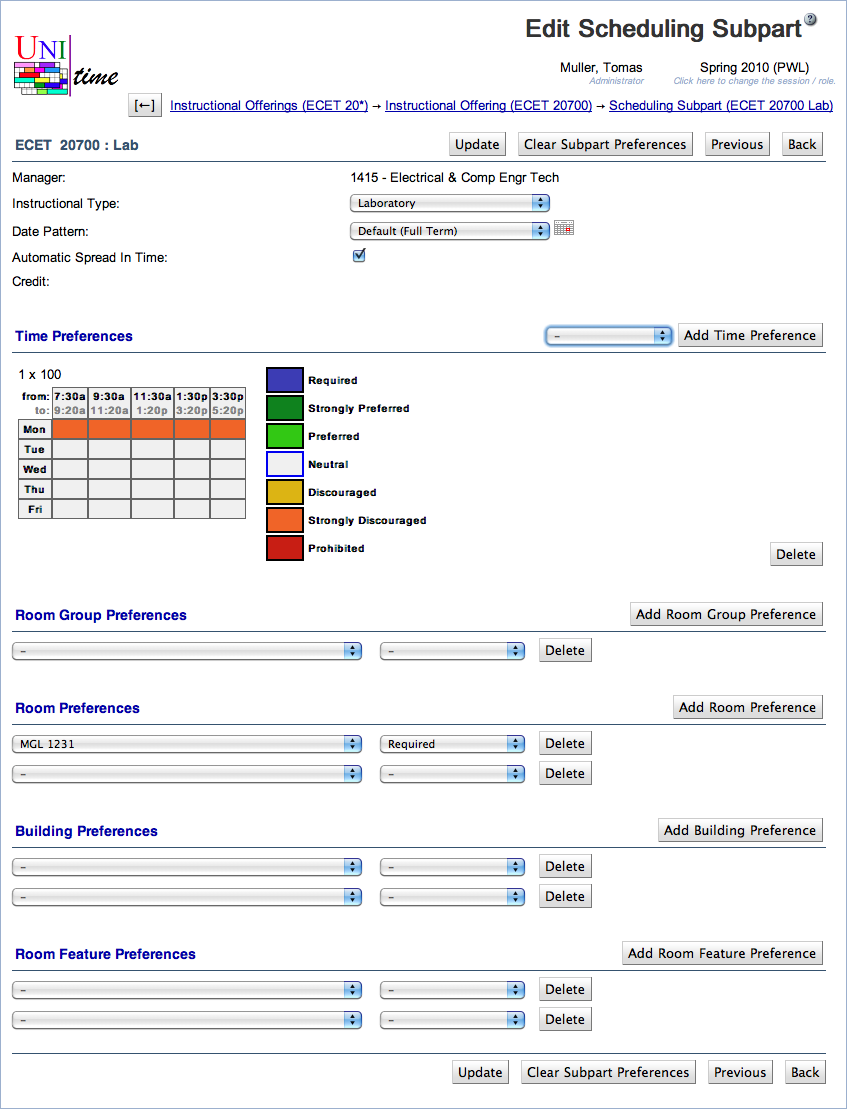
In the Scheduling Subpart Edit screen, you can modify several properties of the scheduling subpart and enter preferences, which will then be applied to the classes associated with the scheduling subpart. The rules explaining how preferences are applied on classes are located in Application Of Preferences. Changes made to this screen are not saved until you click on the Update, Previous, or Next button.
Details
- Instructional Type
- To change the instructional type, select the new type from the drop-down list
- Date Pattern
- To change the date pattern, select the new date pattern from the drop-down list
- You can click on the icon of the calendar to see which dates belong to the selected date pattern
- By default, a drop-down is used. It can be changed to a searchable box by setting
unitime.classEdit.searchableDatePattern to true
- Automatic Spread In Time
- Checked by default, which means that when the classes of this subpart are timetabled, the solver will attempt to spread the different classes in time so that students have more options (Spread in Time constraint is automatically created between all the classes of the subpart).
- Uncheck only if you need the classes to follow a different pattern, e.g., when you need some classes to be at the same time (unchecking this checkbox will prevent the solver from applying the Spread in Time constraint between these classes)
- Student Overlaps
- Not checked by default
- If checked, students will be allowed to take classes from this subpart even when they are overlapping with other classes
- Subpart Credit
- Credit that is attributable to this subpart
- Only available when the subpart credit is enabled using the
tmtbl.subpart.credit.editable property in the Application Configuration.
- Described in the screen documentation for the Edit Course Offering screen
Preferences
Time
- If you don’t see any time grid, you need to select a time pattern from the drop-down list and click the
 plus icon
- You can have more than one possible time pattern for your classes - in that case, perform the previous step again to add another time grid
- Indicate the time preferences by filling in the time slots with appropriate colors (click on the colored square in the legend and then on the squares in the time grid that you want to fill in with this preference level)
- Click on the day of the week (or combination of days of the week) to fill in the grid for the whole day (or combination of days)
- Click on a particular time to fill in the grid for this time (across all the days)
- Click on the upper left-hand side corner (which has “from:” and “to:”) to fill in the whole time grid
-
To delete a time pattern, click on the  cross icon next to the pattern name
-
Note: Only time patterns that match the duration set on the scheduling subpart (on the Instructional Offering Configuration screen) are available in the drop-down. When Minutes per Week is used, that means that the number of minutes per week set on the subpart must equal the number of meetings per week × minutes per meeting set on the time pattern.
- Note: To express that, e.g., the classes of this scheduling subpart can only be taught on Monday, Wednesday, and Friday, fill in Tuesday and Thursday times as “Prohibited” (as opposed to setting Monday, Wednesday, and Friday as “Required”); this leaves you the flexibility to indicate preferred or discouraged times within Monday, Wednesday, and Friday
Date Patterns
- Select a date pattern from the first drop-down list and the preference level from one of the options
- To add more lines for additional date pattern preferences, click the plus icon
- To delete a line with a date pattern preference, click on the cross icon on that line
-
Blank lines are ignored
- Note: Date pattern preferences are only available when a date pattern of the Pattern Set type is selected on the scheduling subpart (containing a list of time patterns, such as 1x for all one-week date patterns)
Room Preferences
- Select a room from the first drop-down list and the preference level from one of the options
- You can see only those rooms that are listed in the Rooms screen for the department managed by the manager listed in your Edit Scheduling Subpart screen (look at Rooms to see how to add new rooms to your list of departmental rooms)
- To add more lines for additional room preferences, click the plus icon
- To delete a line with a room preference, click on the cross icon on that line
-
Blank lines are ignored
- Note: If a class requires two or more rooms, you can also select which room (s) the preference applies to in an additional drop-down.
Building Preferences
- Select a building from the first drop-down list and the preference level from one of the options
- You can see only those buildings that are listed in your Rooms screen for the department of this scheduling subpart’s manager
- To add more lines for additional building preferences, click the plus icon
- To delete a line with a building preference, click on the cross icon on that line
-
Blank lines are ignored
- Note: If a class requires two or more rooms, you can also select which room (s) the preference applies to in an additional drop-down.
Room Feature Preferences
- Select a room feature from the first drop-down list and the preference level from one of the options
- You can see only those room features that are listed in the Rooms screen
- If you need to add another room feature for your departmental rooms, go to the menu, to Courses → Input Data → Room Features
- To add more lines for additional room feature preferences, click the plus icon
- To delete a line with a room feature preference, click on the cross icon on that line
-
Blank lines are ignored
- Note: If a class requires two or more rooms, you can also select which room (s) the preference applies to in an additional drop-down.
Room Group Preferences
- Select a room group from the first drop-down list and the preference level from one of the options
- You can see only those room groups that are applicable to classes of the given manager (for example, for LLR classes you can see groups of large lecture rooms); for your departmental classes, you can see only those room groups that are listed in your Room Groups screen - if you need to add another room group, go to the menu, to Courses → Input Data → Room Groups
- To add more lines for additional room group preferences, click the plus icon
- To delete a line with a room group preference, click on the cross icon on that line
-
Blank lines are ignored
- Note: If a class requires two or more rooms, you can also select which room (s) the preference applies to in an additional drop-down.
Operations
- Update (Alt+U)
- Clear Subpart Preferences (Alt+C)
- Clear all the subpart preferences on this page and go back to the Scheduling Subpart Detail screen (where you can see that the preferences have been cleared)
- Previous (Alt+P)
- Save changes and go to the Edit Scheduling Subpart screen for the previous scheduling subpart
- Next (Alt+N)
- Save the preferences and go to the Edit Scheduling Subpart screen for the next scheduling subpart
- Back (Alt+B)
Notes
Room Groups vs. Room Features
The difference between room groups and room features is as follows:
- If you require more than one room group for a given scheduling subpart, it is sufficient if the assigned room belongs to one of them
- If you require more than one room feature, the assigned room has to have all of them