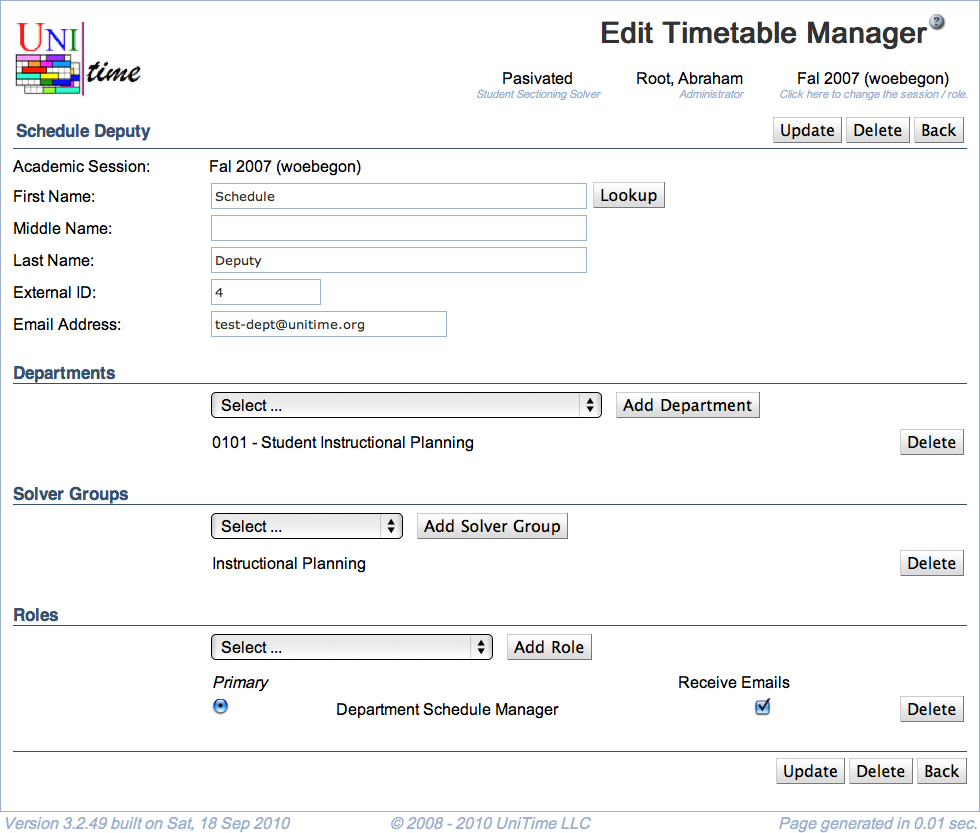
In the Edit Timetable Manager screen you can edit information about an existing manager.

The upper part of the screen contains the following
Select a department in the drop-down list and click Add Department to make the user a manager for a department. To remove user’s access to a department, click Delete on the line with that department.
Note: A user that has Departmental Schedule Manager role has to be associated with at least one department.
Select a solver group for which the user should be able to create a timetable and click Add Solver Group. To remove user’s access to a solver group, click Delete on the line with that solver group.
Note: Solver groups are only needed for the Departmental Schedule Manager and similar roles that have non-admin access to the course timetabling solver.
Select a role for the user from the drop-down list and click Add Role. Select which role should be the primary one (the one applied whenever the user logs on to the application). To remove a role, click Delete on the appropriate line.
The default manager roles are:
Additional roles can be defined on the Roles page and their permissions on the Permissions page
Additional notes about roles:
Please note that all information except of the solver groups and departments are session-independent (there is one record for each timetabling manager shared between all the academic session). This means that a user cannot have a different role for different academic sessions or departments, but they may be associated with different departments or solver groups in each academic session.
The Update Academic Sessions section allows to indicate any future academic sessions of the same academic initiative that will have the departments and solver groups updated with the matching information. By default, all academic sessions of the same academic initiative that have the matching departments and solver groups are pre-selected.
| Back to UniTime Online Documentation | © UniTime 2026 | Content available under GNU Free Documentation License 1.3 |